Integration basic
Set up your first integration to display a 3D configurator on your website, collect analytics, and store orders — all without writing code.
By the end of this guide, you’ll understand how integrations work in Amaspace and create your first integration step by step.
What is an integration in Amaspace?
An integration is the connection between your website and Amaspace.
It allows Amaspace to:
- Display a 3D configurator on your site
- Collect analytics for that configurator
- Store configured orders inside the platform
You don’t need to write any code.
The integration handles authorization and data flow automatically.
How integrations work
An integration represents one website.
Important rules to keep in mind:
- One website can have only one integration
- One integration can include multiple configurators (products)
- One product can be connected to multiple integrations
This structure keeps analytics, orders, and configuration data clean and predictable.
Video
Available platforms

When you create an integration, you choose the platform your website runs on.
Amaspace supports:
- Shopify
- WordPress
- Wix
- Webflow
- Custom website (via Webhook)
Choose the platform that matches how your website is built.
This ensures the correct integration method and settings.
Setting up your first integration
Follow these steps to create a new integration.
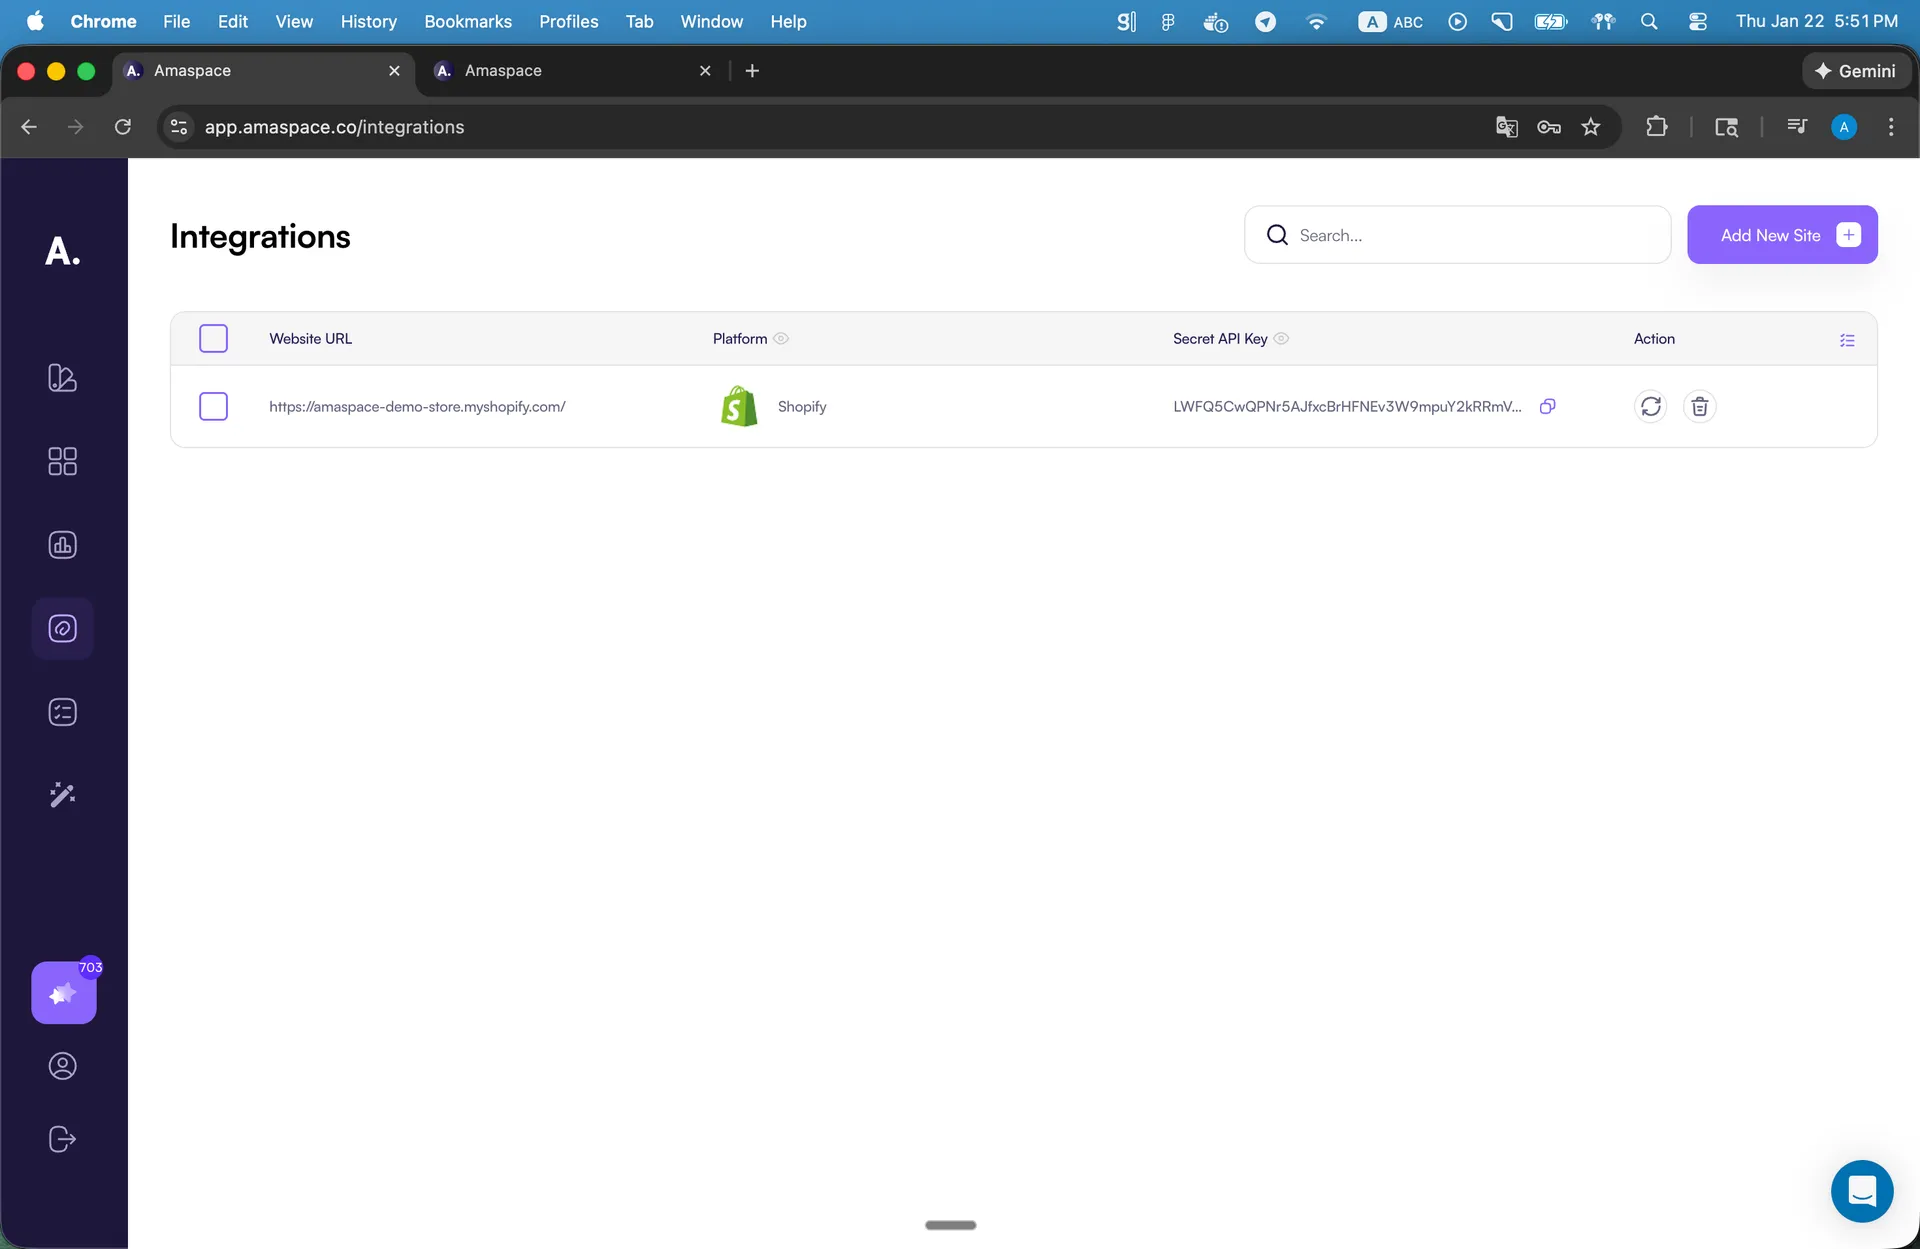
Step 1: Open the Integrations page
Go to the Integrations section in your Amaspace dashboard:
https://app.amaspace.co/integrations
This page shows all websites connected to your account.
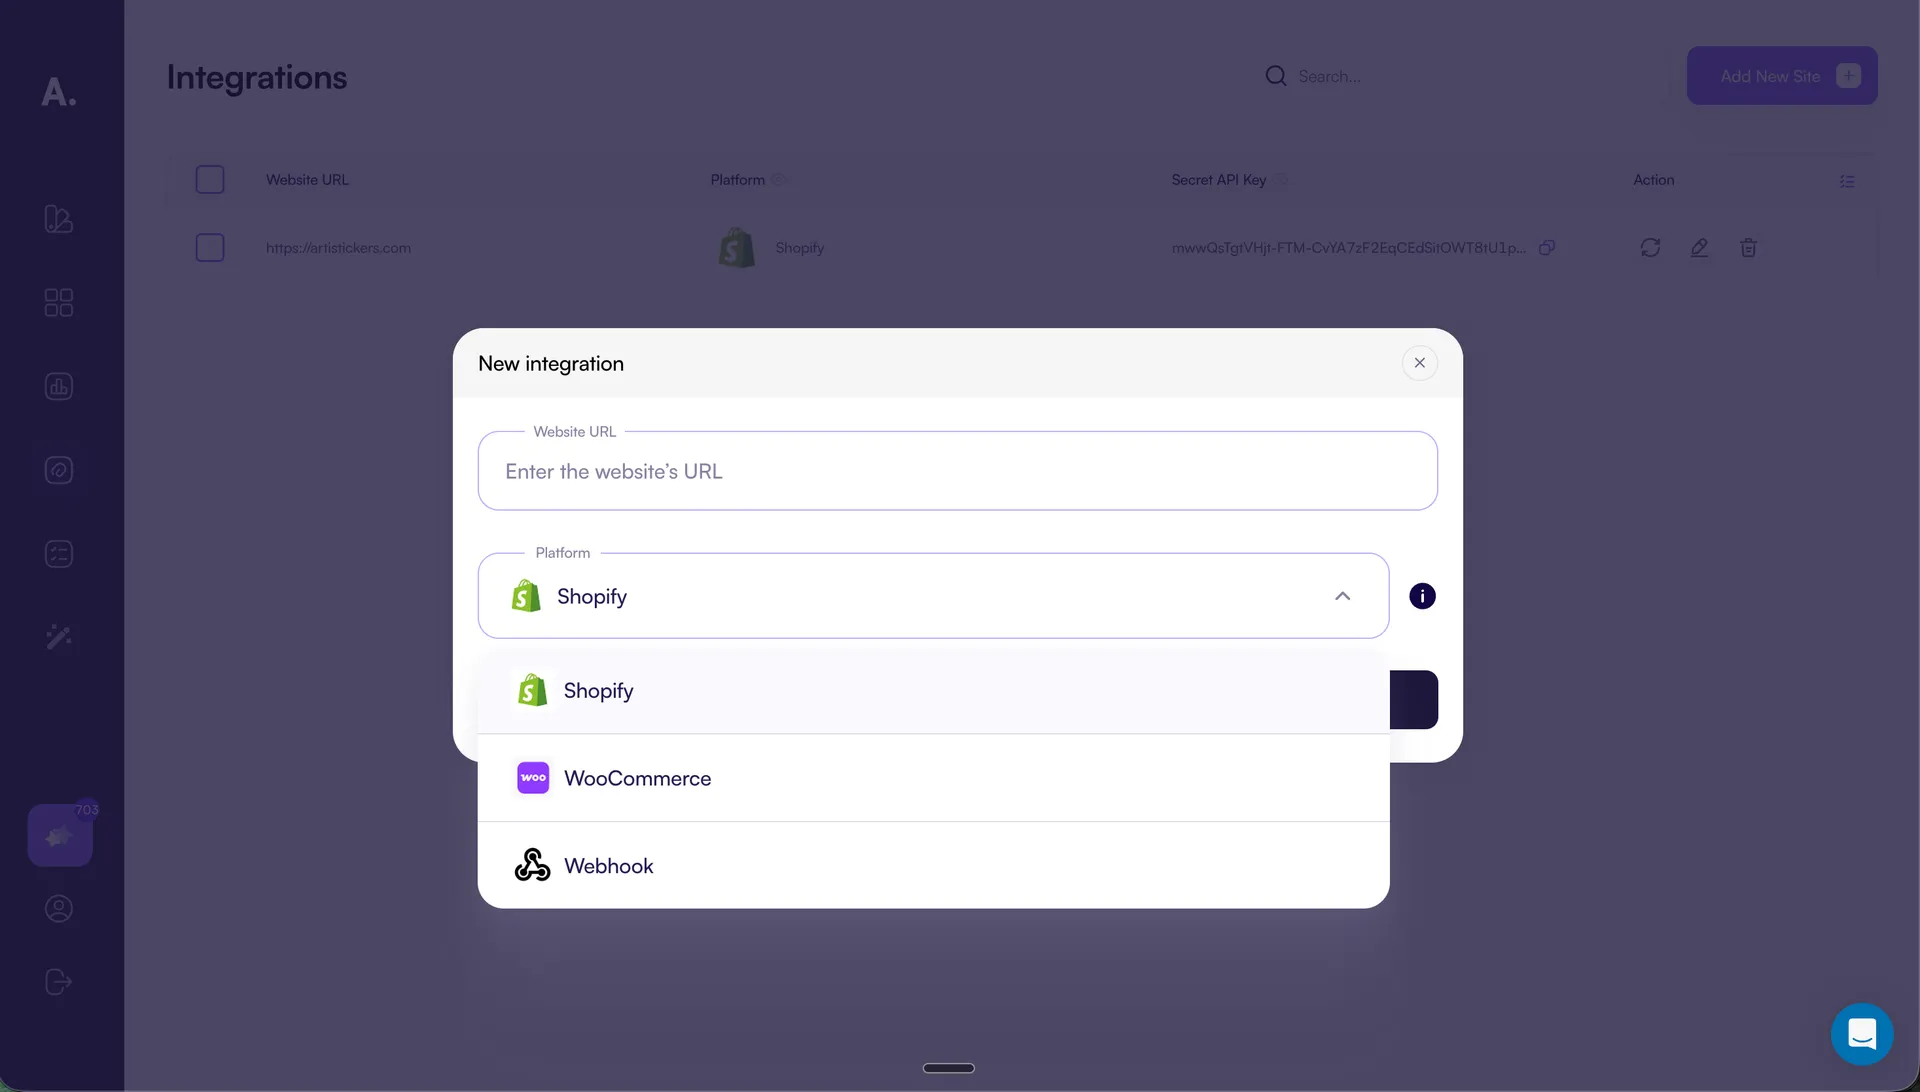
Step 2: Add a new site
- Click Add new site
- Enter the Website URL
- Select the Platform
- Click Create Integration
Amaspace stores the integration and generates a Secret API Key automatically.

Step 3: Connect a configurator to an integration
Creating an integration is not enough. You also need to assign it to a configurator.
-
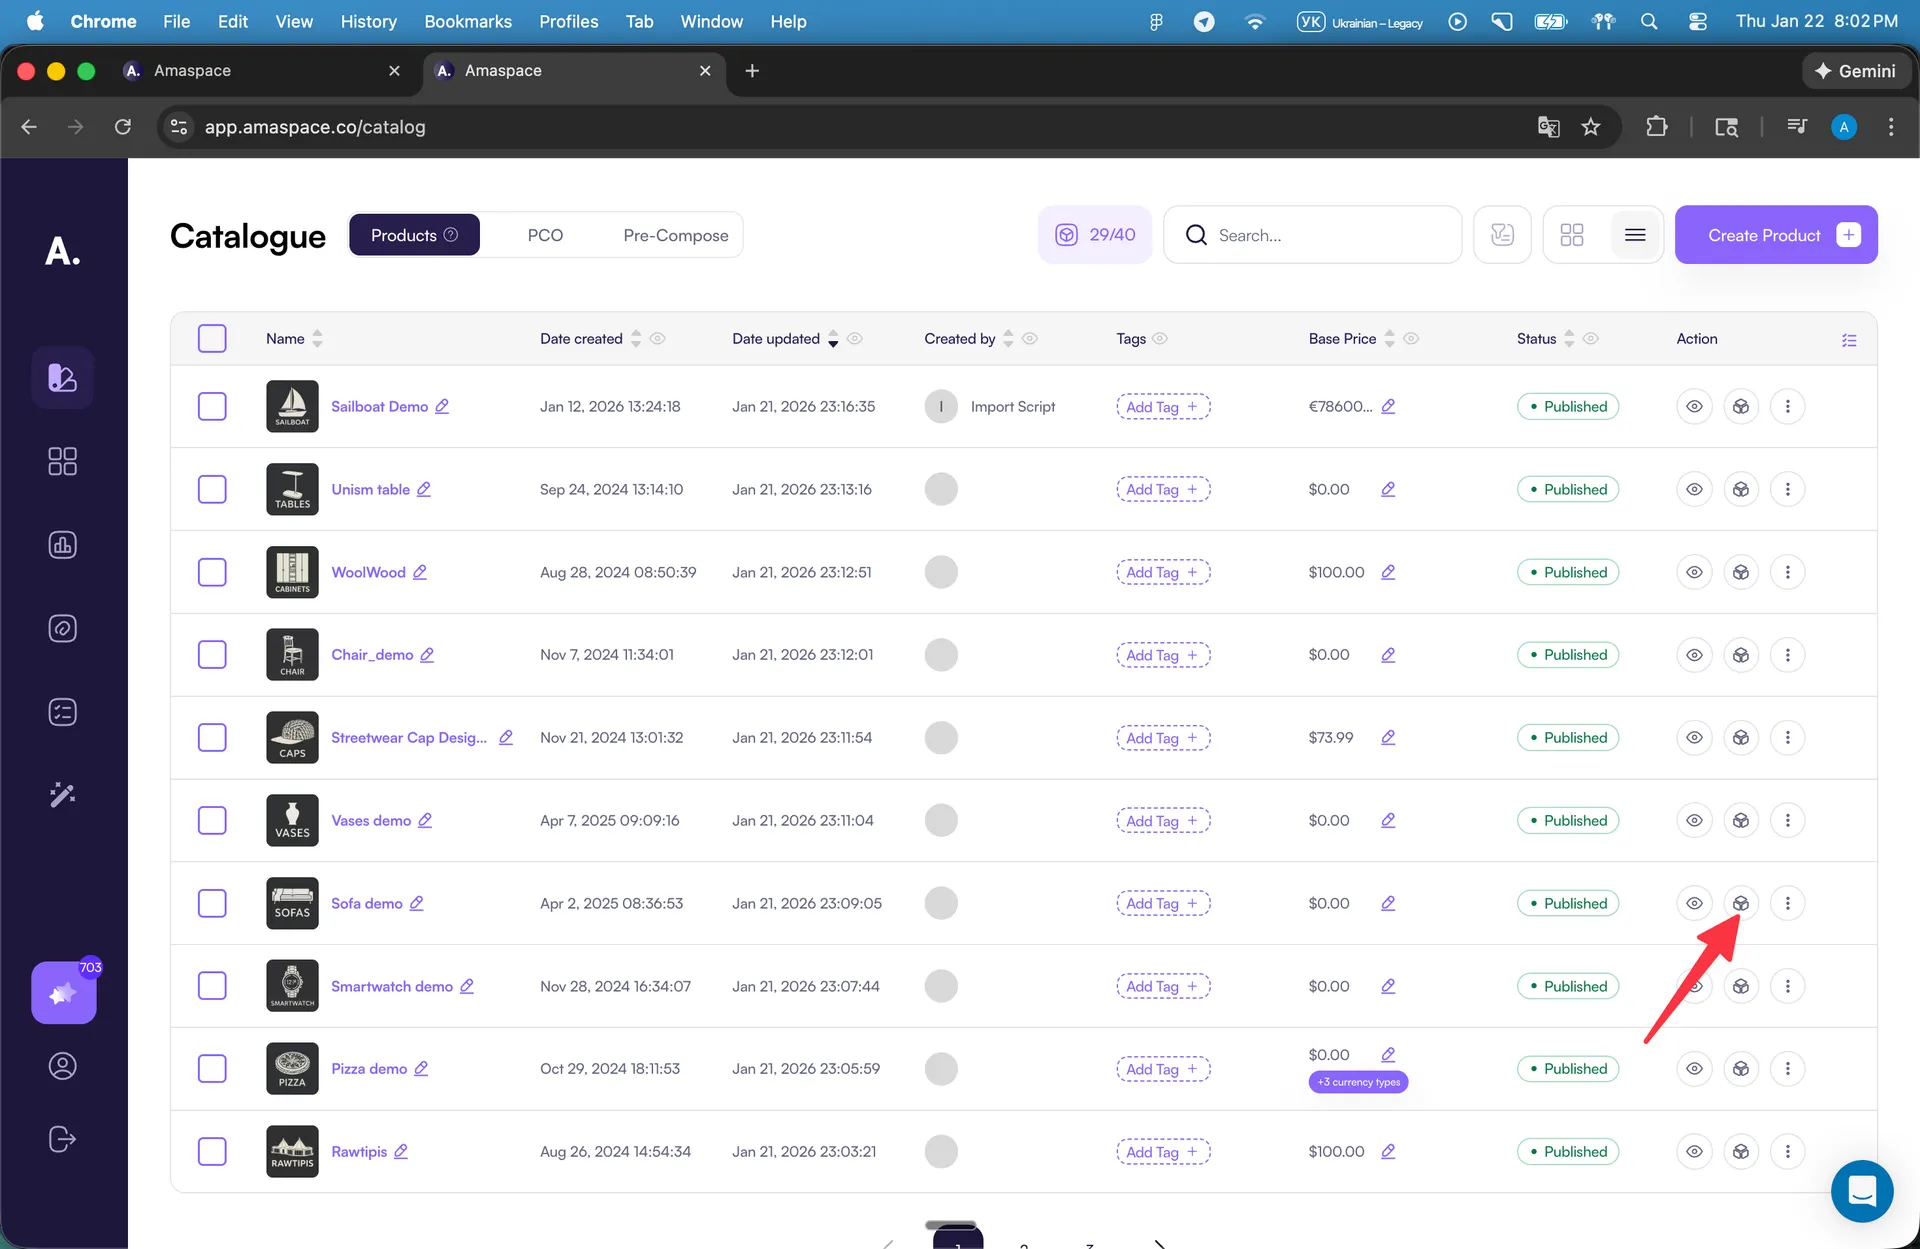
Go to the product catalog https://app.amaspace.co/catalog
-
Open the configurator editor you want to publish
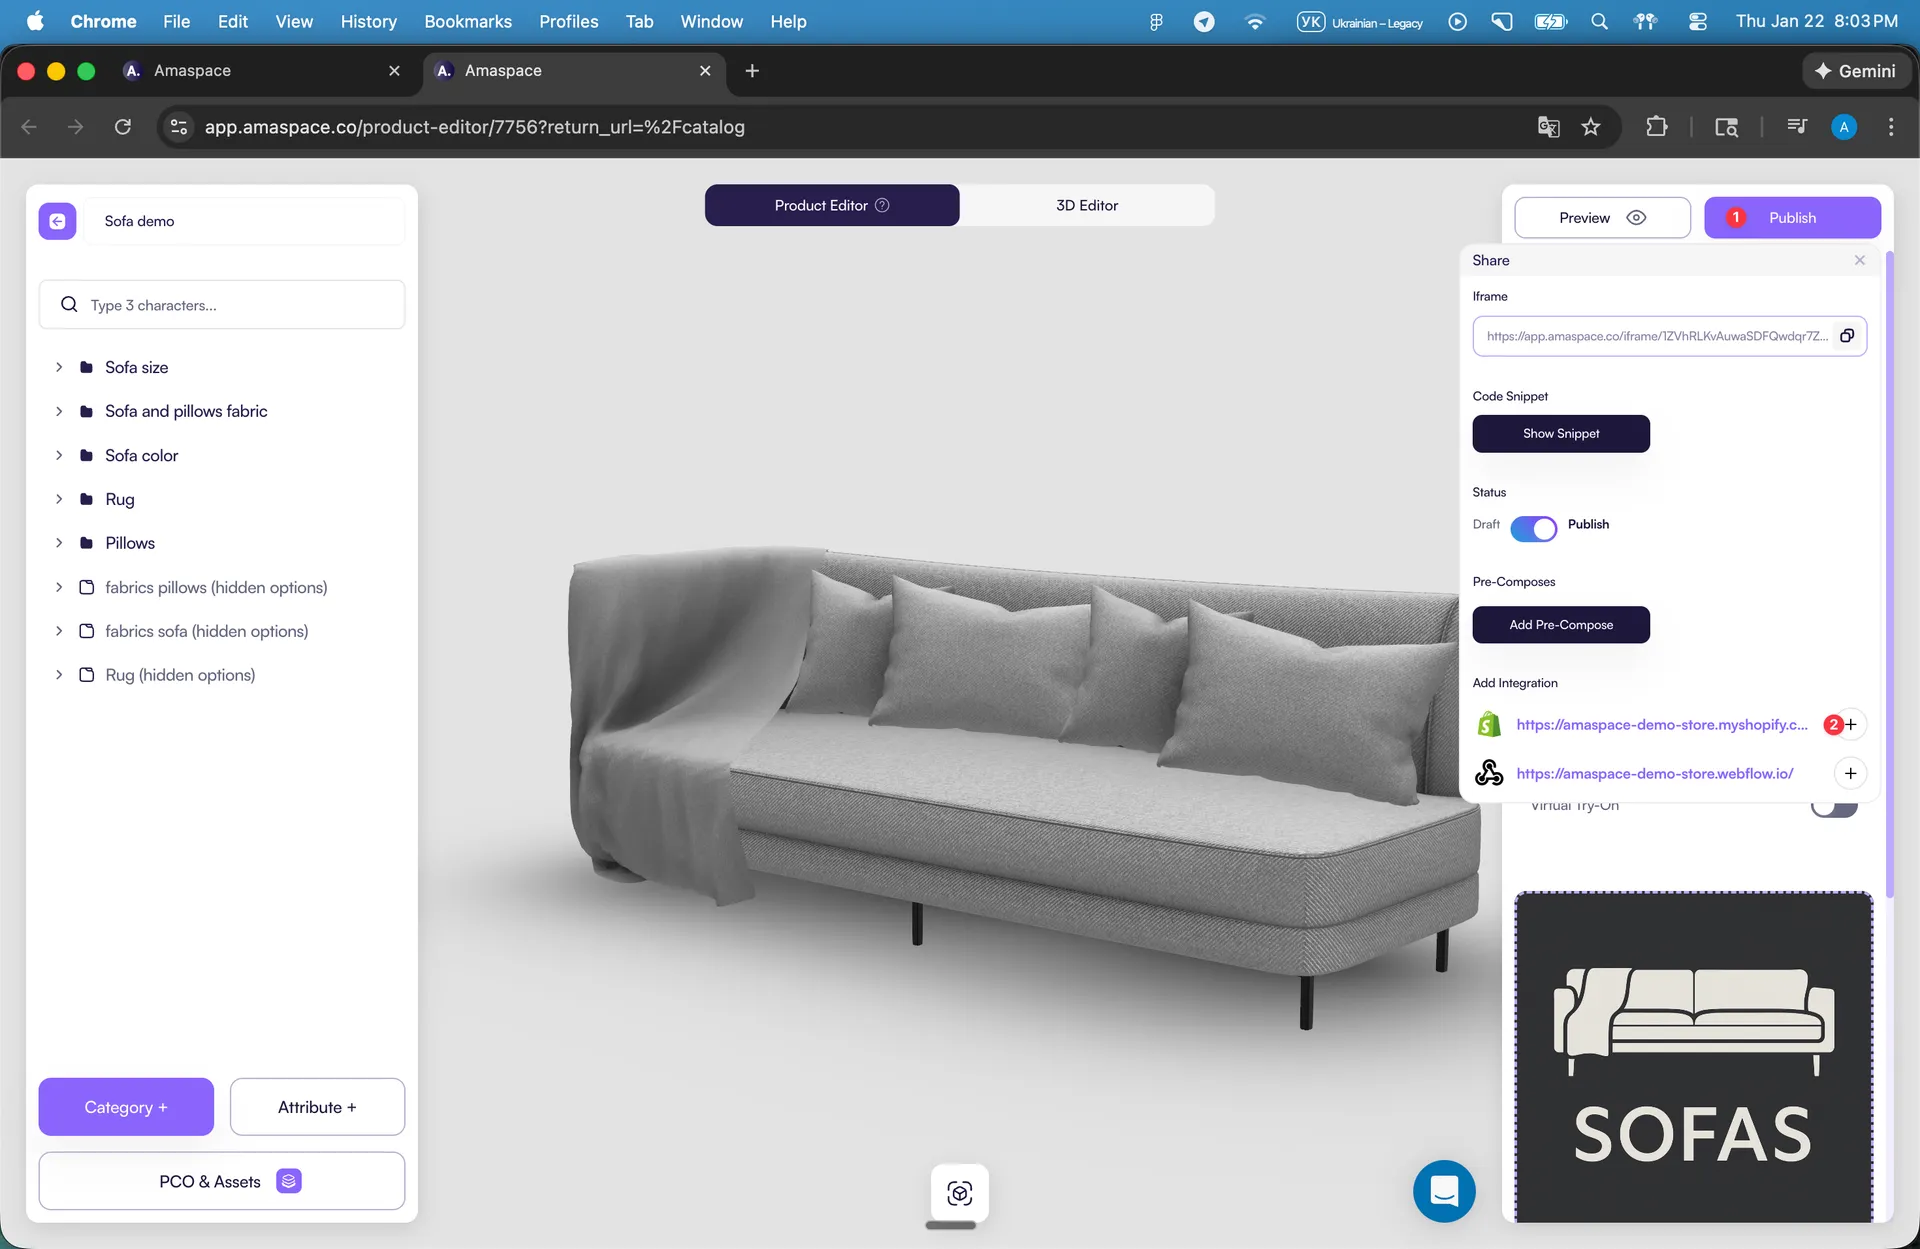
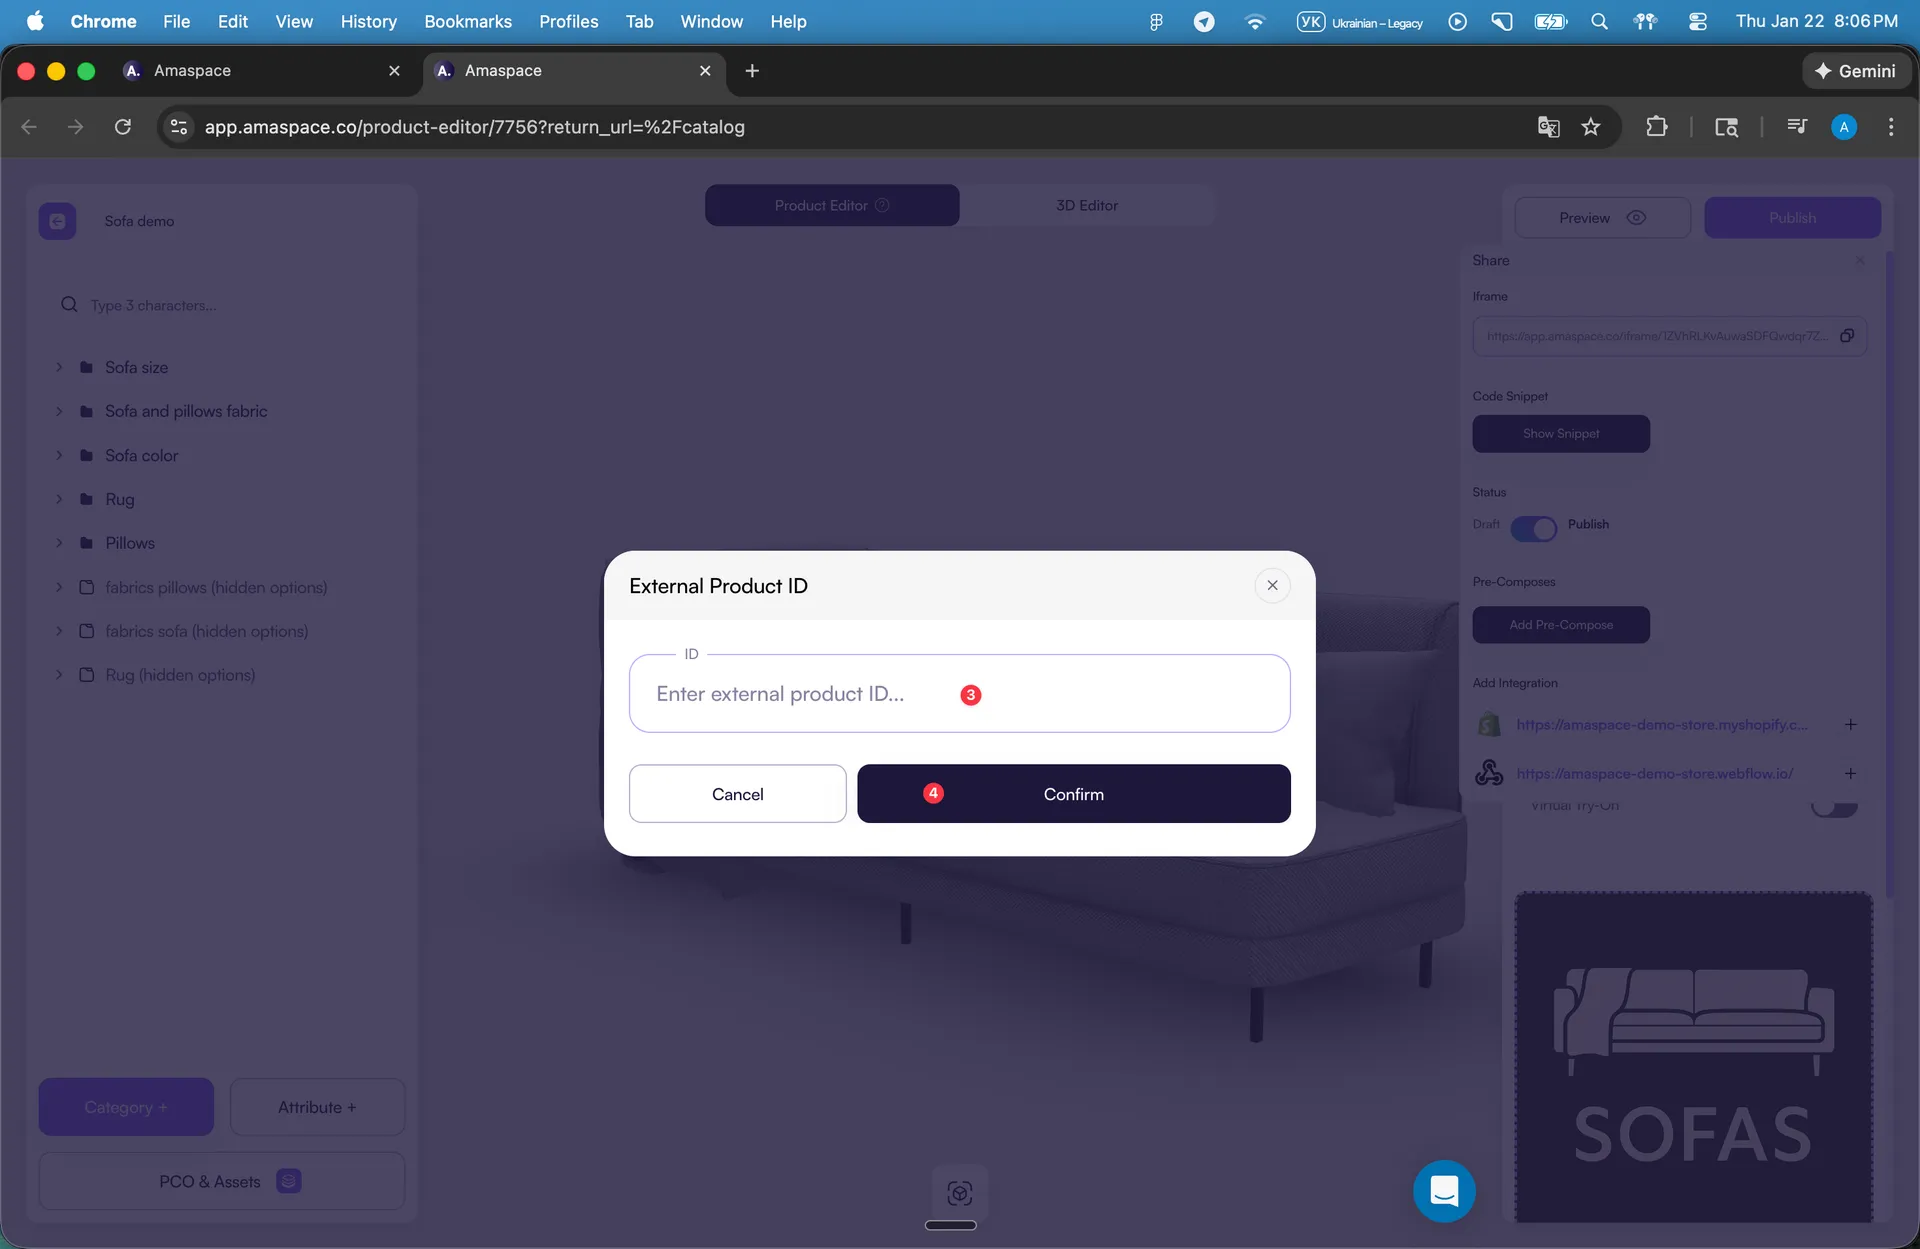
Step 4: Connect the configurator to your integration
- Click Publish
- Select the integration
- Enter the Product ID from your website
- Save changes
The configurator is now linked to that site.
Step 5: Add the integration to your website using a platform plugin
After you publish a configurator to an integration, you need to add the integration to your website.
You do this using a platform-specific plugin or app.
No custom code is required.
The plugin uses your Secret API Key to authorize the configurator on your site.
Important notes
- Each website uses one integration
- Each integration has one Secret API Key
- The same product can work across multiple integrations
- Reset the API key immediately if it’s exposed
Why do you need a Product ID?
The Product ID connects the configurator to a specific product on your website.
This allows Amaspace to:
- Track where the order comes from
- Match website orders with Amaspace configurations
- Show correct analytics per product and per site
Without this ID, order synchronization and analytics won’t work correctly.