WooCommerce Integration
Install the Amaspace Customizer and add an interactive 3D product to your WooCommerce store in under 10 minutes. https://wordpress.org/plugins/amaspace/
By the end of this guide, you’ll have Amaspace installed, added to your theme, and visible on your storefront.
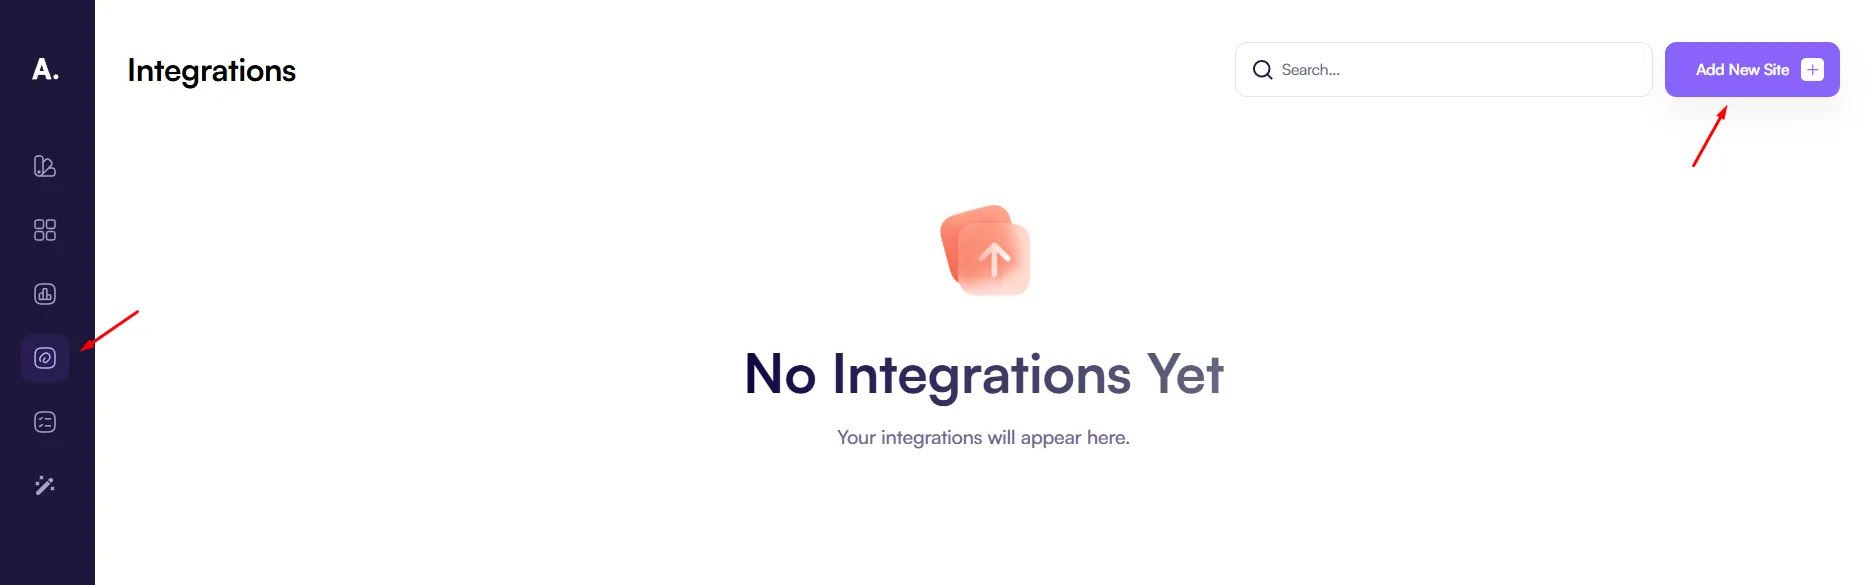
Step 1 — Add a site and install the plugin
Go to the Integrations page and click the “Add new site” button to add a new website.
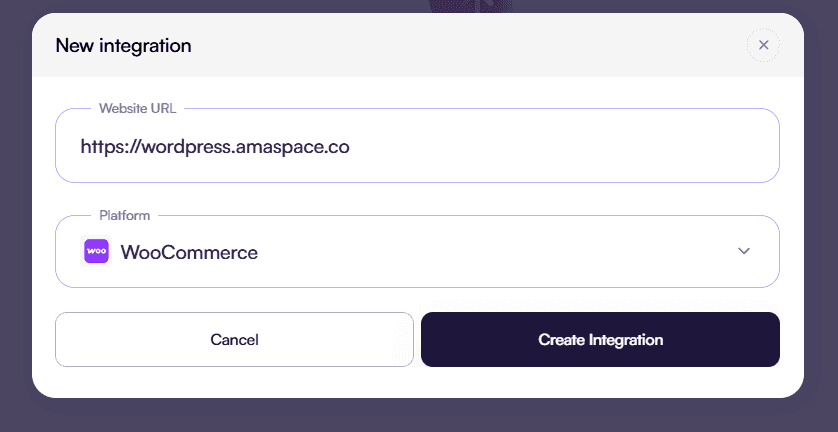
In the opened popup, enter the website URL and select WooCommerce as the site type.
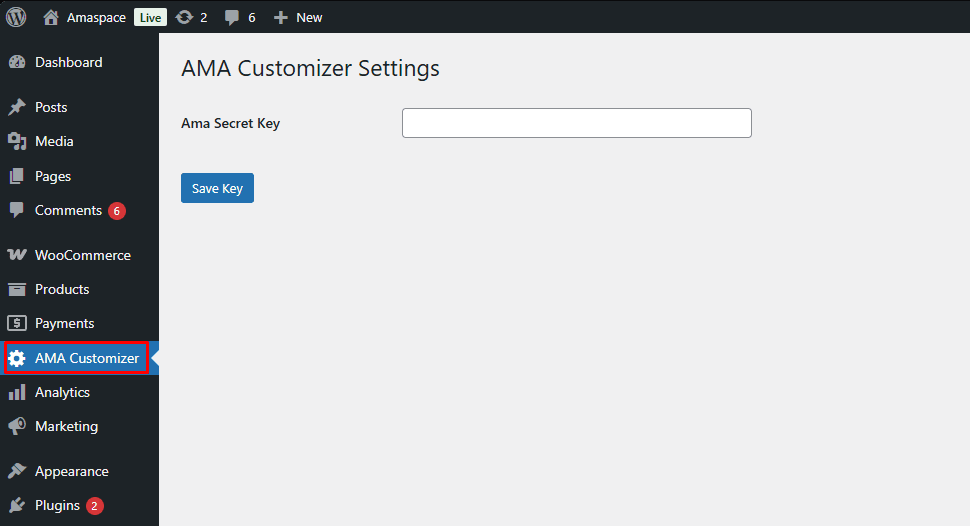
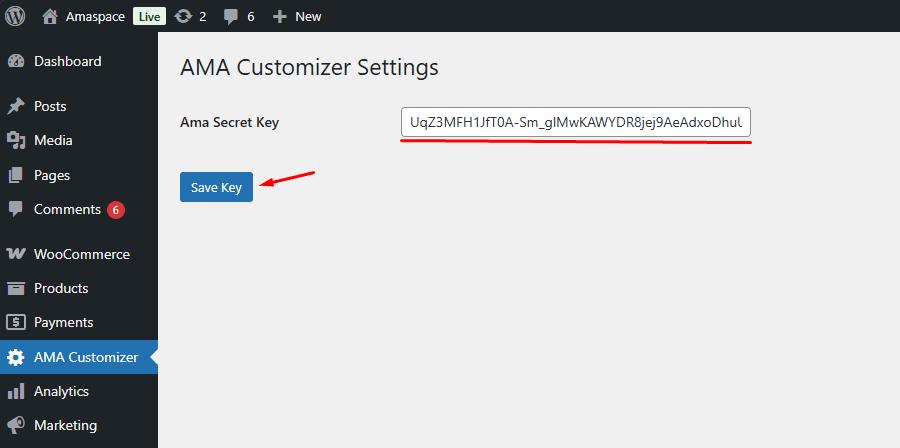
Install and activate the Amaspace plugin in WordPress. After activation, a new AMA Customizer page will appear in the WordPress admin panel. Open this page and paste the site key into the provided field.
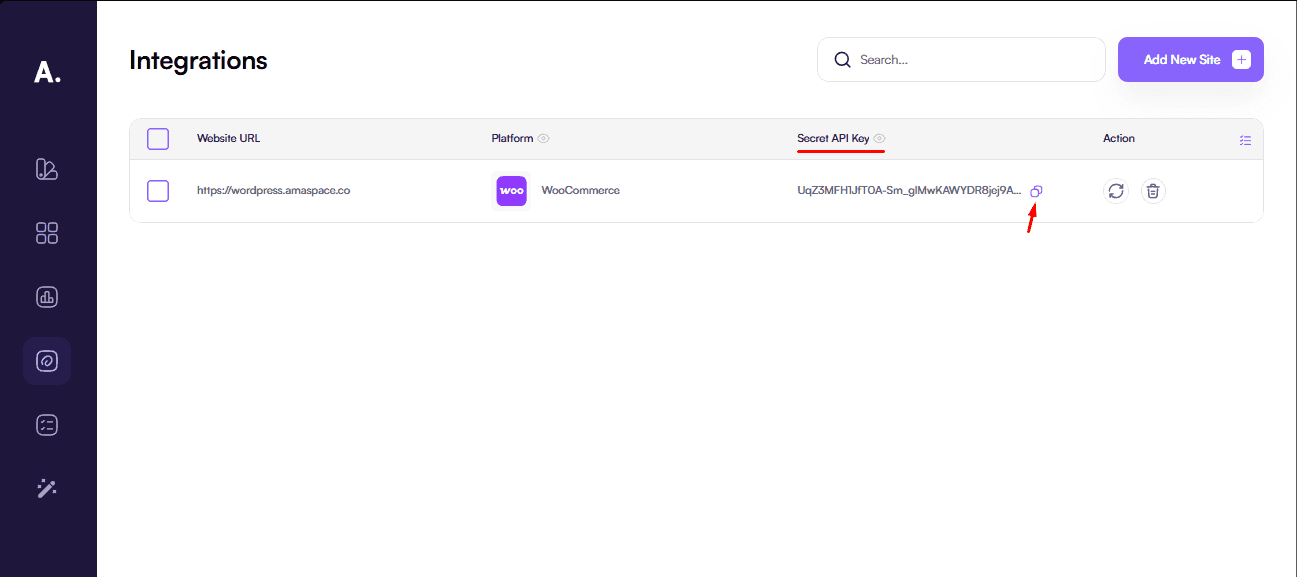
To get the key, open Amaspace Admin → Integrations, find your site, and copy the Secret API Key.
Paste the key on the AMA Customizer page and click Save Key.
Step 2 — Display the configurator
You can display the configurator in two ways:
- By linking it to a product
- Using a shortcode
Option 1 — Link the configurator to a product
In WordPress admin, open Products, select the target product, and copy its Product ID.

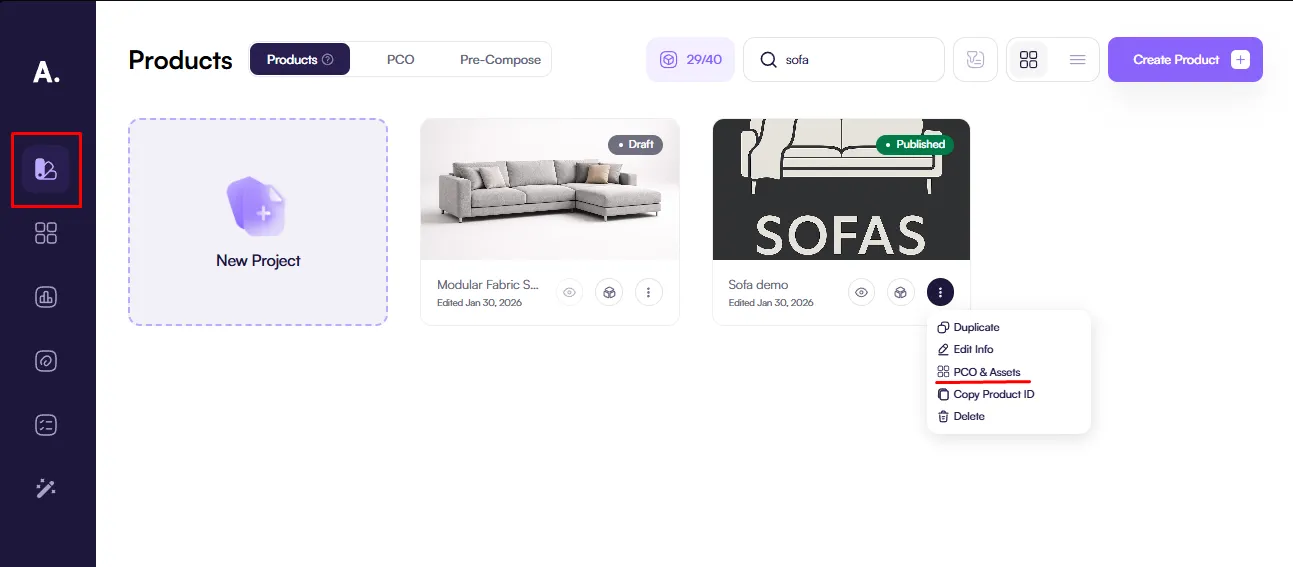
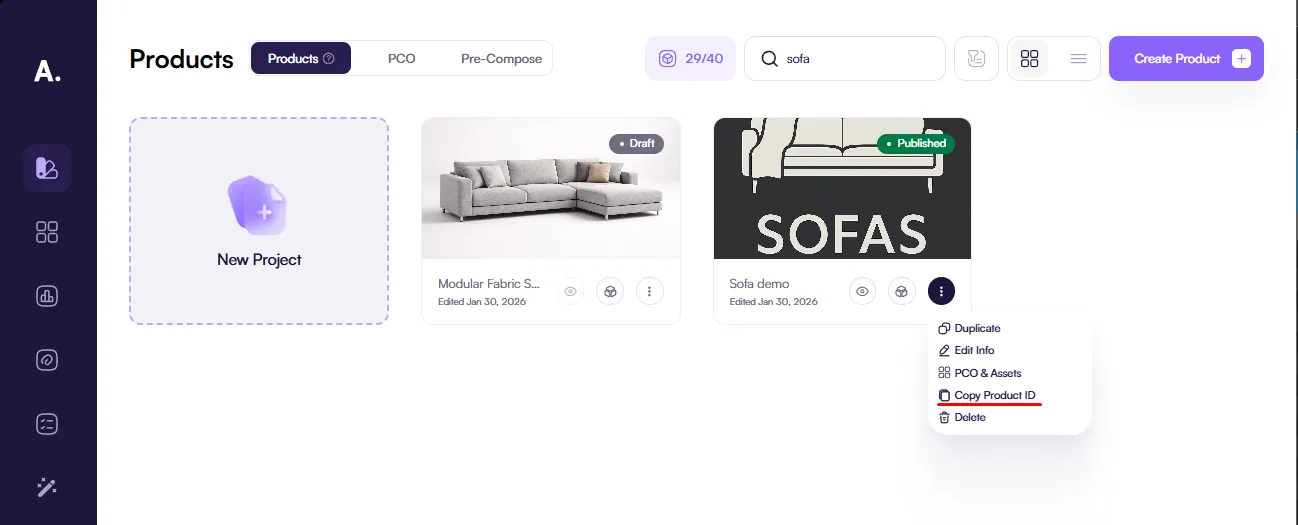
In Amaspace Admin, go to Catalog, select the target product, click the three dots next to it, and open PCO & Assets.
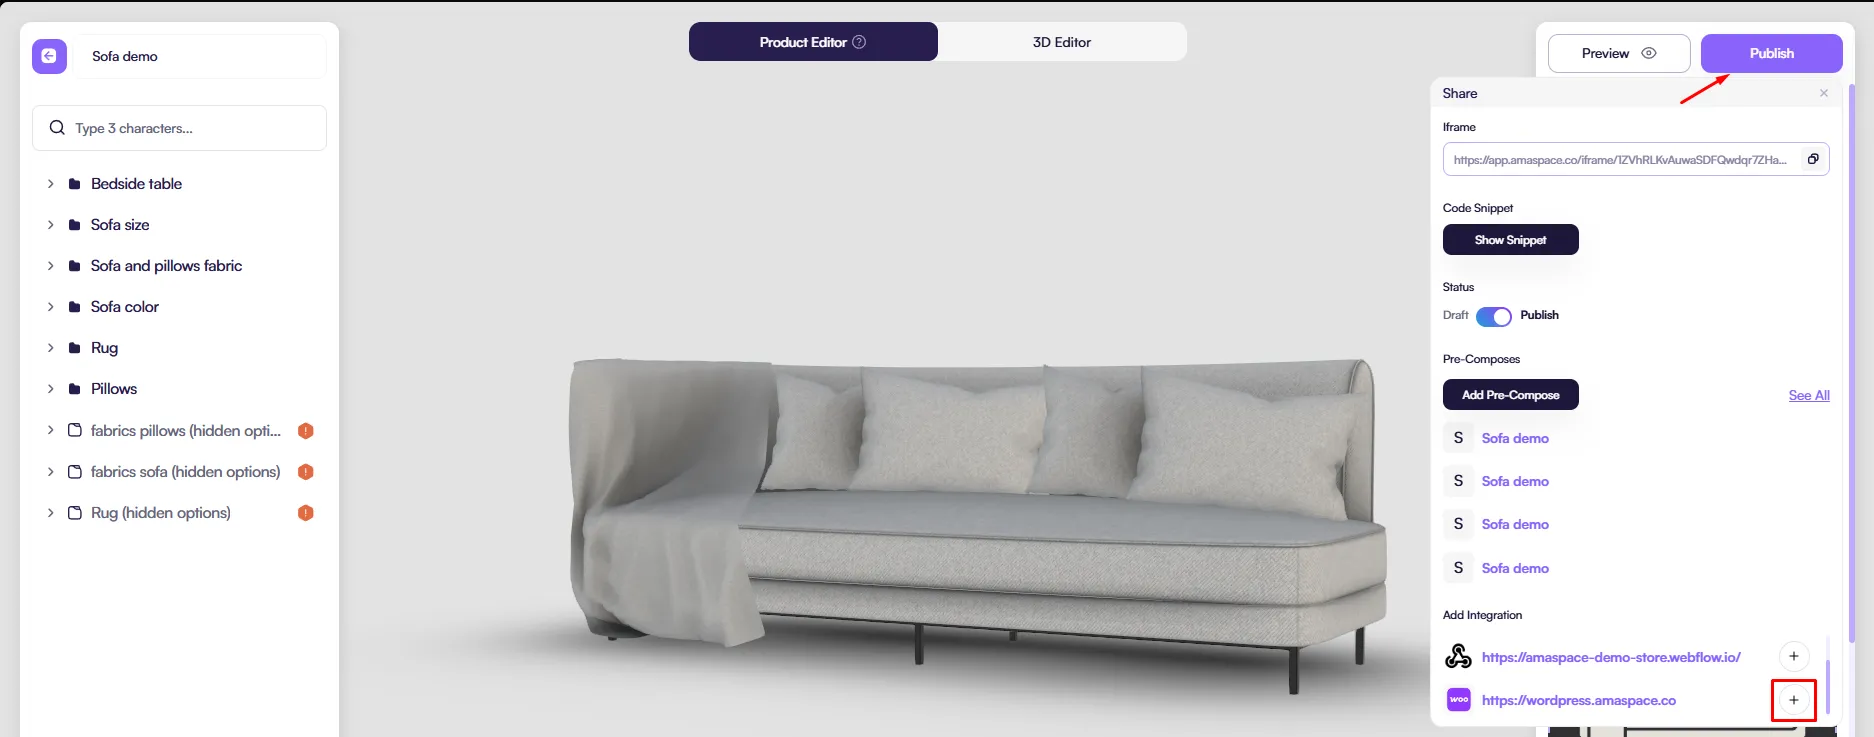
Click Publish (or Manage if the product status is Draft).In the integrations section, select the required integration and click +.
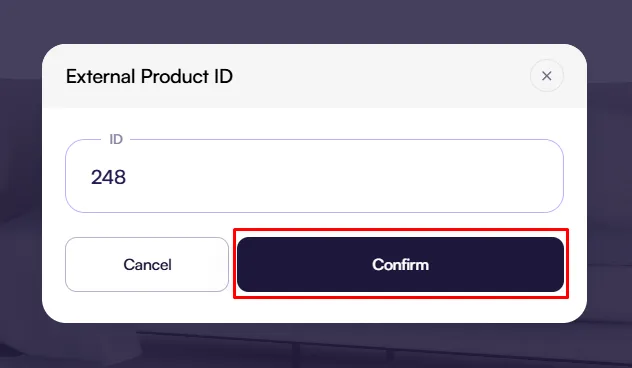
In the popup, paste the WordPress Product ID and click Confirm.
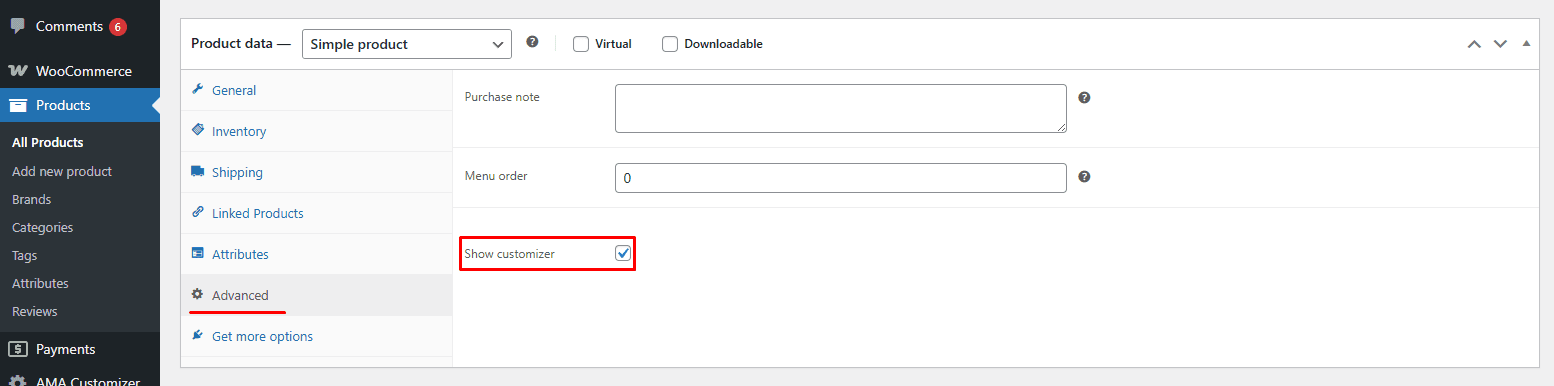
In WordPress admin, open the product, go to Advanced, and enable Show customizer.
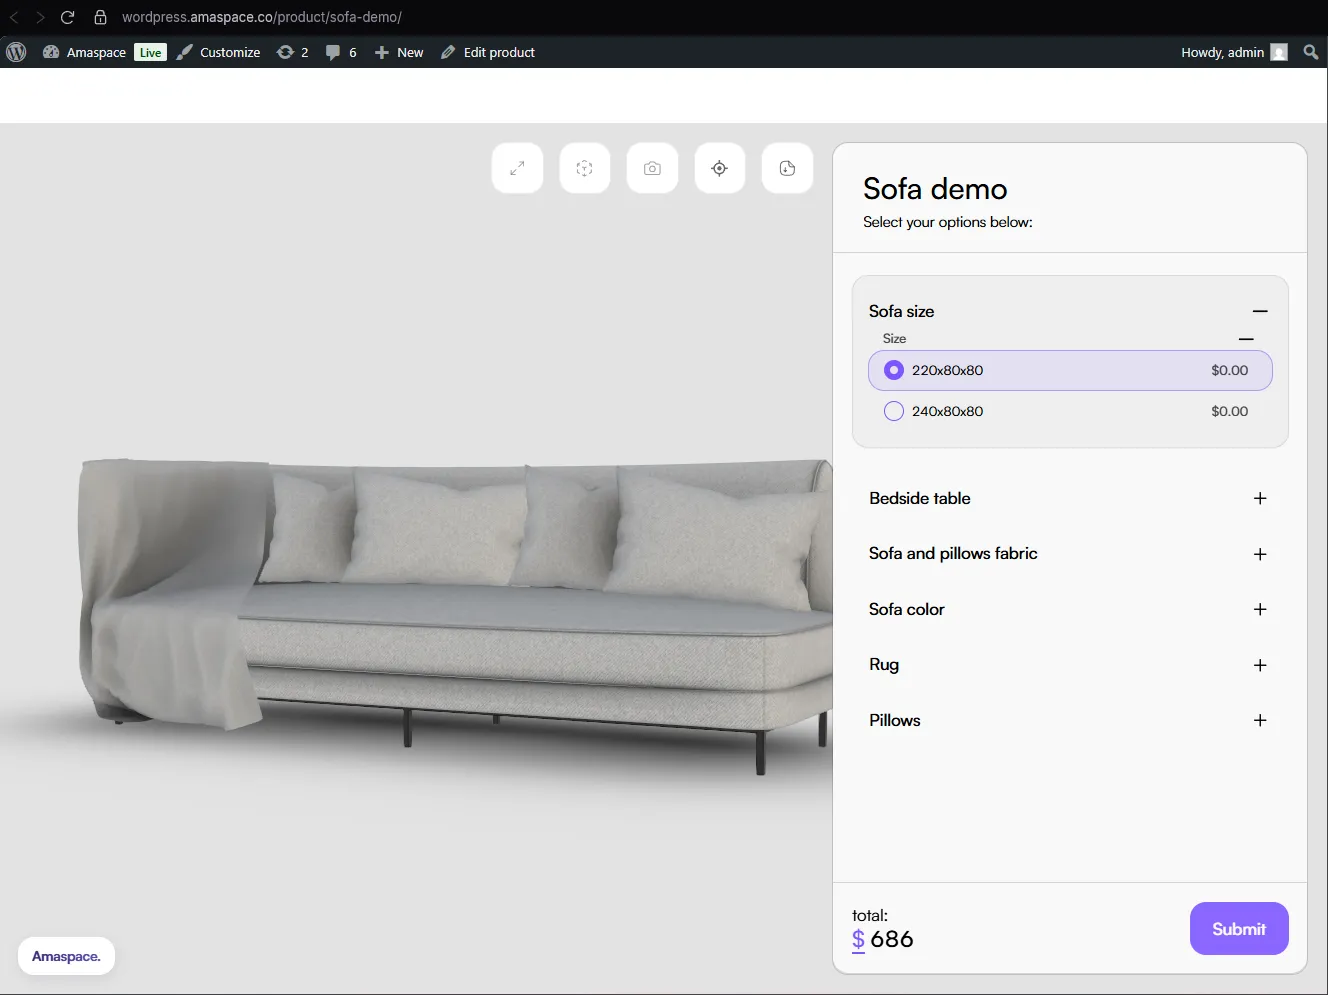
After that, the configurator will appear on the product page.
Option 2 — Use a shortcode
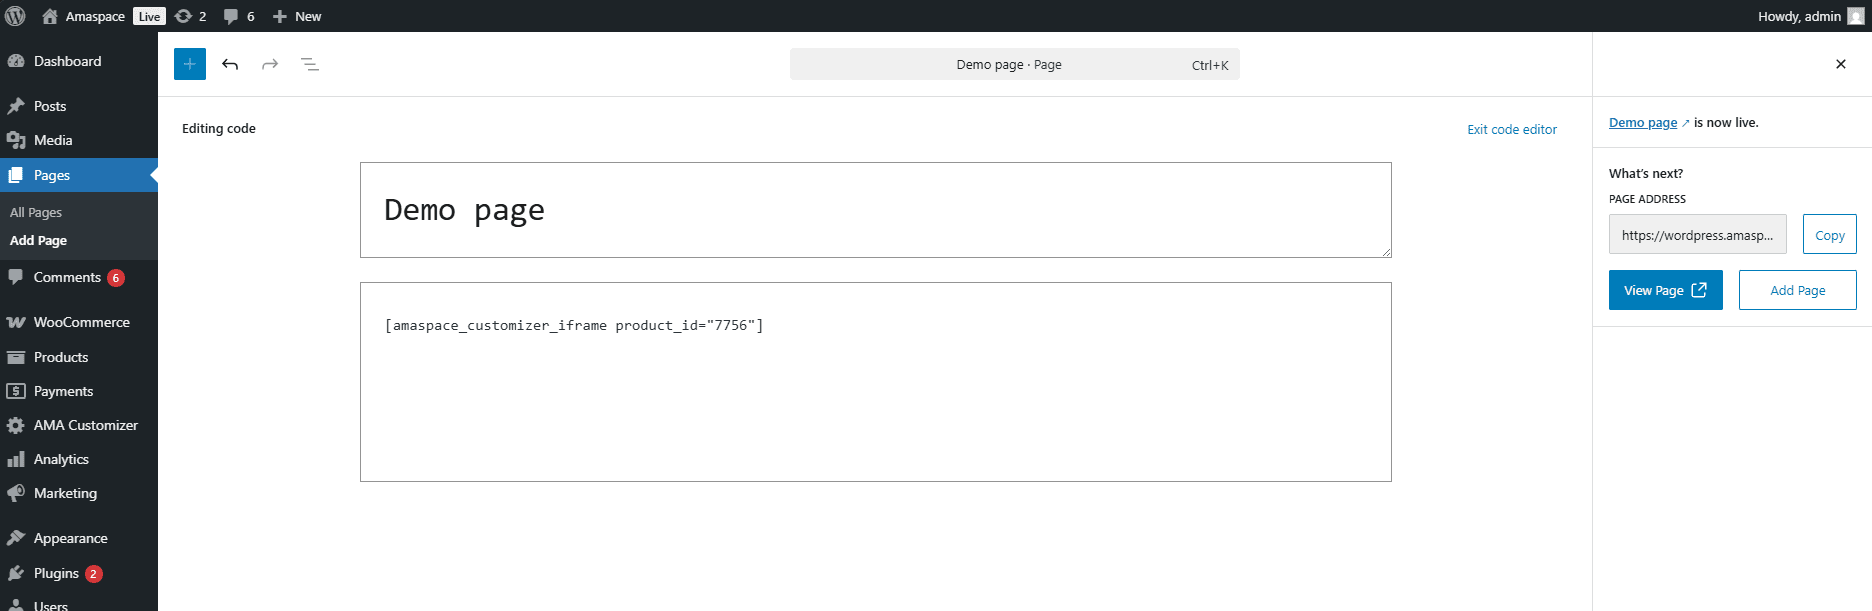
You can embed the configurator on any page using the shortcode:
[amaspace_customizer_iframe product_id="123"]Replace product_id with the Amaspace Product ID. To copy it, go to Amaspace Admin → Catalog, select the product, click the three dots, and click Copy ID.
Add the shortcode to any page or post.
The configurator will appear on that page.

Important notes
-
The product in Amaspace must have Published status for the configurator to appear.
-
Linking the configurator to a WordPress product is required if you want configurations to be saved as variants of the linked product, instead of creating new products in WordPress.