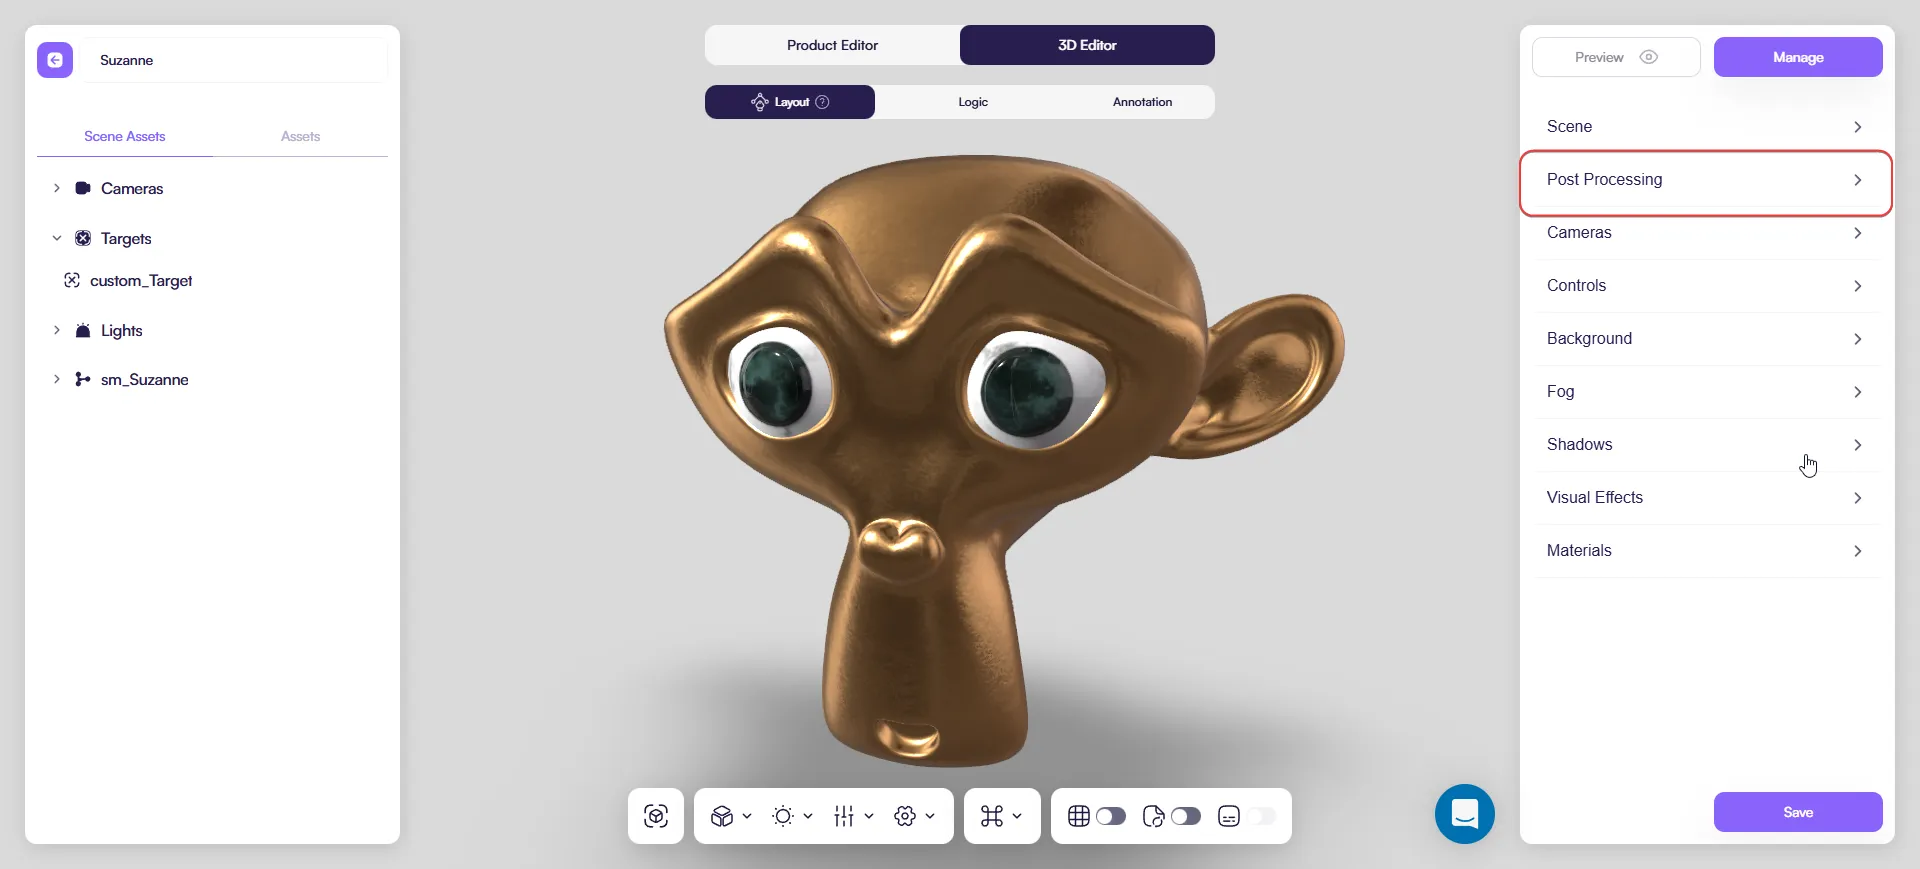
Post Processing
Post Processing helps your configurator look more “photo-ready” — softer highlights, cleaner edges, and a bit more mood. We don’t use it in every scene, because too many effects can slow things down. The best results usually come from one or two subtle effects, not a full stack.
Location
Open 3D Editor → Scene → Post Processing.
How it works
- Pick an effect in Post Effects.
- Turn Enabled on.
- (Optional) Turn on Enabled on Mobile if you need it on phones.
- Keep it subtle with Opacity.
- Use Reset if the look goes in the wrong direction.
Before you start
Tone mapping: control it in one place
Amaspace has tone mapping in two places:
- Scene settings (Tone Mapping + Exposure) — active by default.
- Post Processing → tone_mapping — an optional override.
To avoid confusing results, use one approach:
- Keep tone mapping in Scene settings (optimal), or
- Enable tone_mapping in Post Processing and adjust it there.
Effects
About Blend Function
Many effects include Blend Function. It controls how the effect is mixed into the final image.
- Keep NORMAL for a clean, realistic look.
- Use other modes only when you want a stylized result — some modes can make the product harder to read (or show little to no improvement).
1) Bloom
Adds a soft glow to the brightest parts of the image. Great for small “premium” accents.
The main control is Luminance Threshold:
- Higher Threshold → glow stays only on strong highlights (clean and controlled)
- Lower Threshold → more areas start glowing (easy to overdo)
Bloom can be triggered by:
- Emissive materials (LEDs, screens) — the most predictable way
- Strong reflections/highlights from lights or environment maps on glossy/metal surfaces
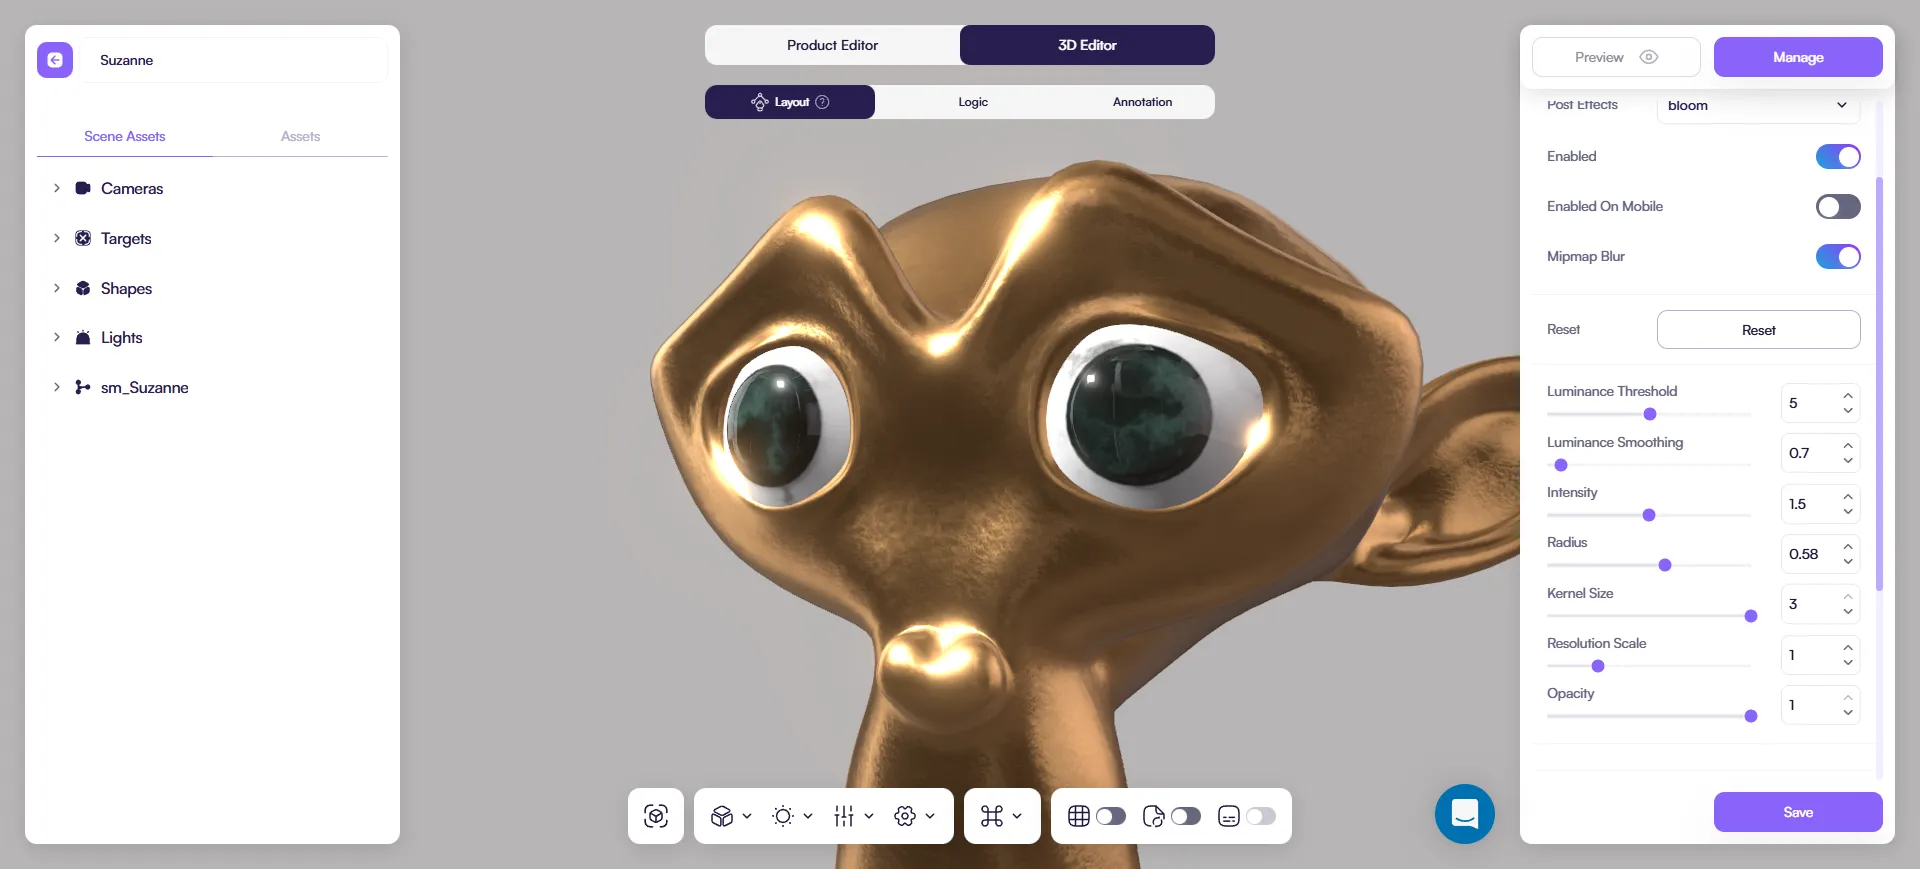
Key settings:
- Luminance Threshold — what counts as “bright enough” (main control)
- Luminance Smoothing — softens the edge around the threshold
- Intensity — glow strength
- Radius — glow spread/softness
- Kernel Size — softness/quality (higher can cost more)
- Resolution Scale — quality vs performance
- Mipmap Blur — smoother bloom (can cost more)
- Opacity — overall amount
Tip: If the scene starts looking foggy, raise Threshold first.
2) Noise
Adds subtle grain. Useful to hide banding and make gradients feel smoother.
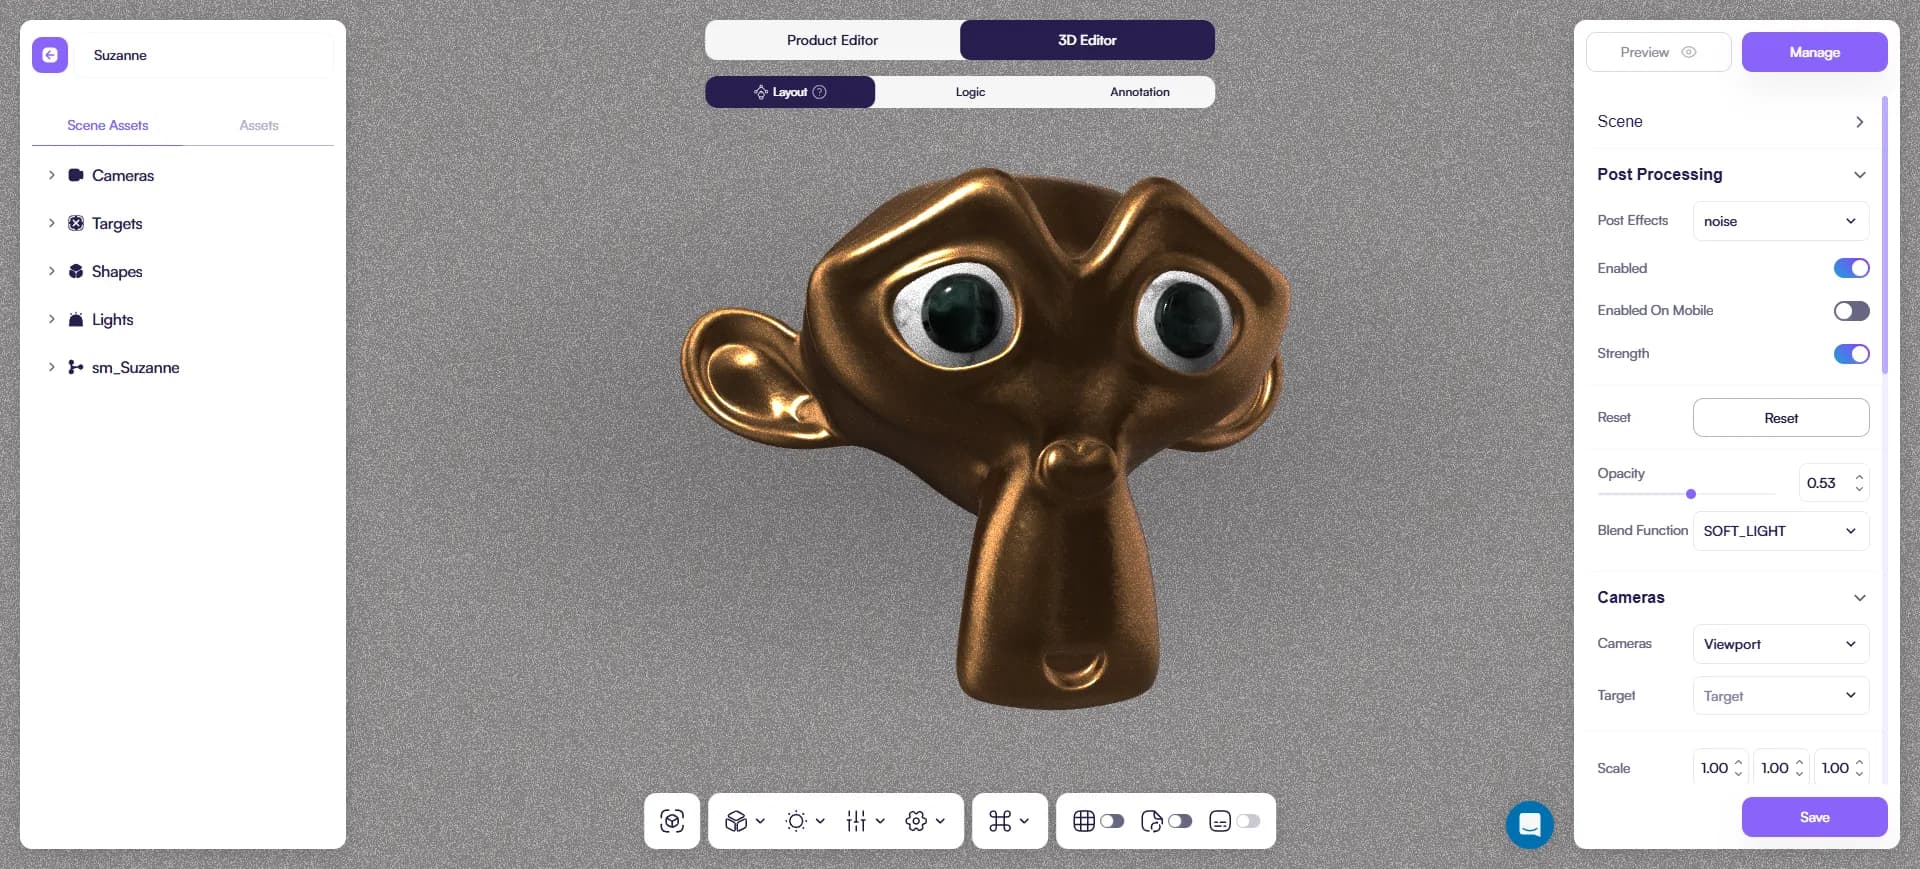
Key settings:
- Opacity — grain amount
- Blend Function — how the grain mixes with the image
To avoid a “dirty” look, keep it subtle and pick a simple blend mode.
Tip: If the grain becomes too visible, lower Opacity before changing blend modes.
3) DOF (Depth of Field)
Blurs foreground/background to push attention to the product.
Use it for:
- hero shots where the camera is stable
- scenes where the product should “pop” from the background
Key settings:
- Bokeh Scale: blur strength
- Resolution Scale: quality vs performance
- Opacity: overall amount
Tip: DOF is easy to overdo. If users notice the blur more than the product, it’s too strong.
4) Chromatic Aberration
Adds slight color separation near edges (stylized lens effect).
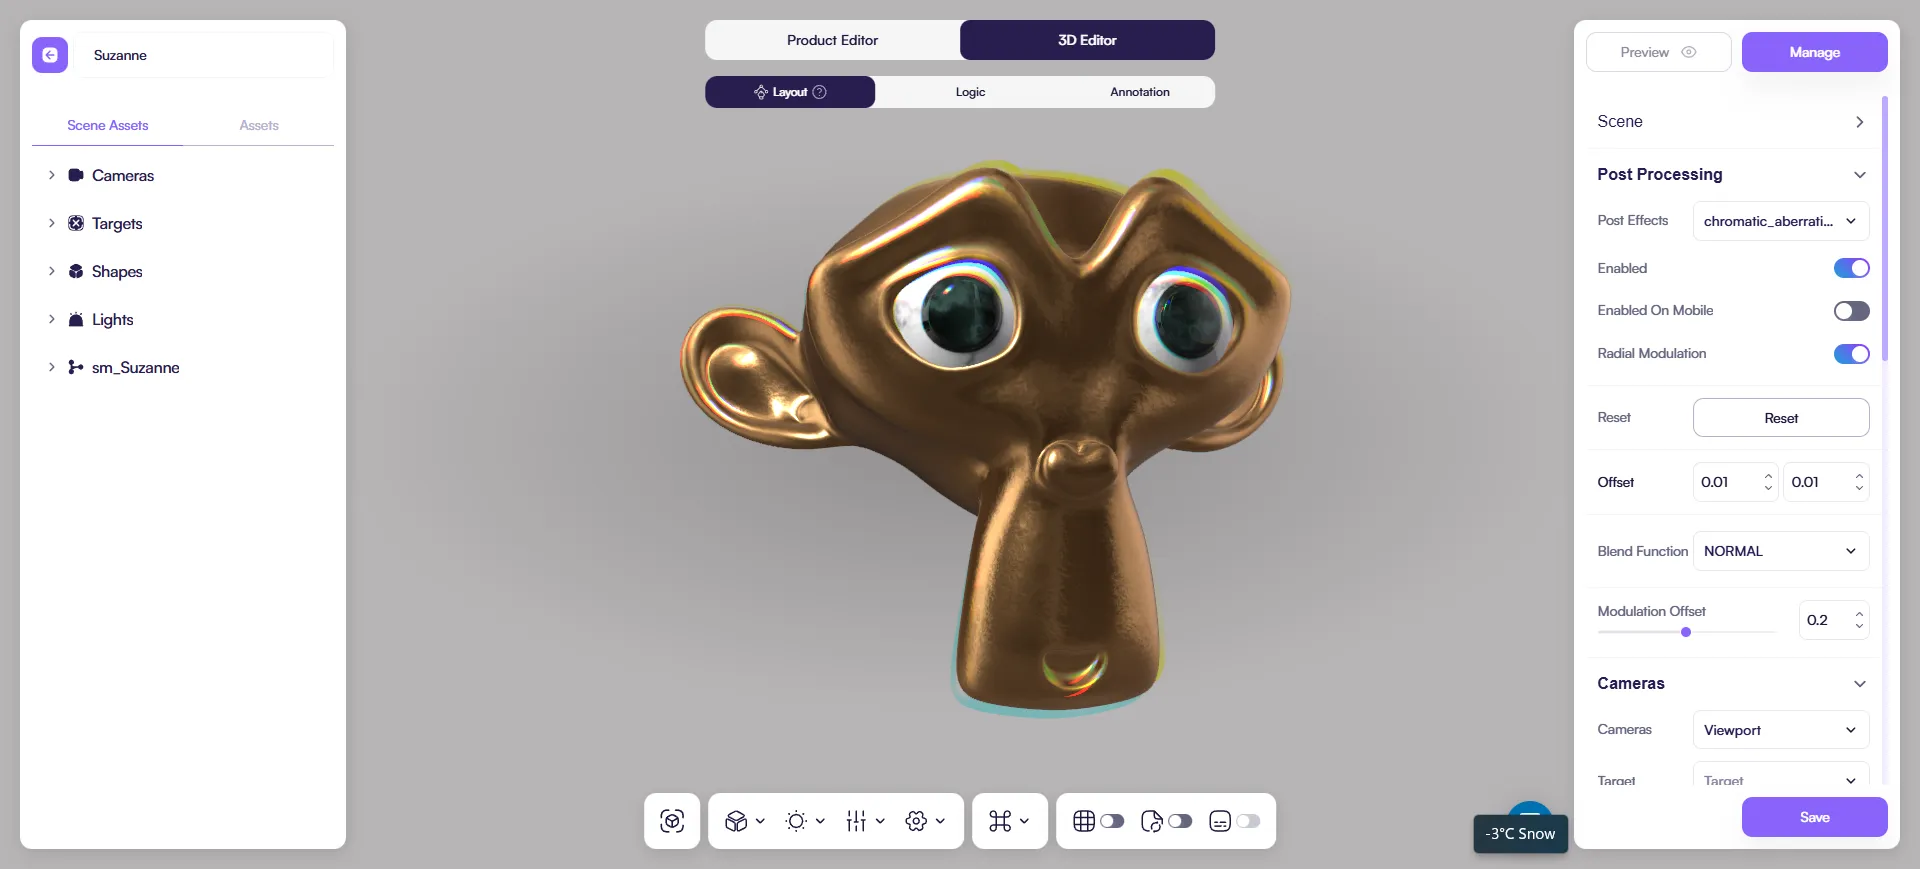
Key settings:
- Offset (X/Y) — strength and direction of the color split
- Radial Modulation — pushes the effect toward screen edges
- Modulation Offset — adjusts where the radial effect starts
- Blend Function — how the effect mixes with the image
Tip: Use this only for stylized scenes. If you can clearly notice the colors, it’s probably too strong.
5) Brightness / Contrast
Quick overall image adjustment.
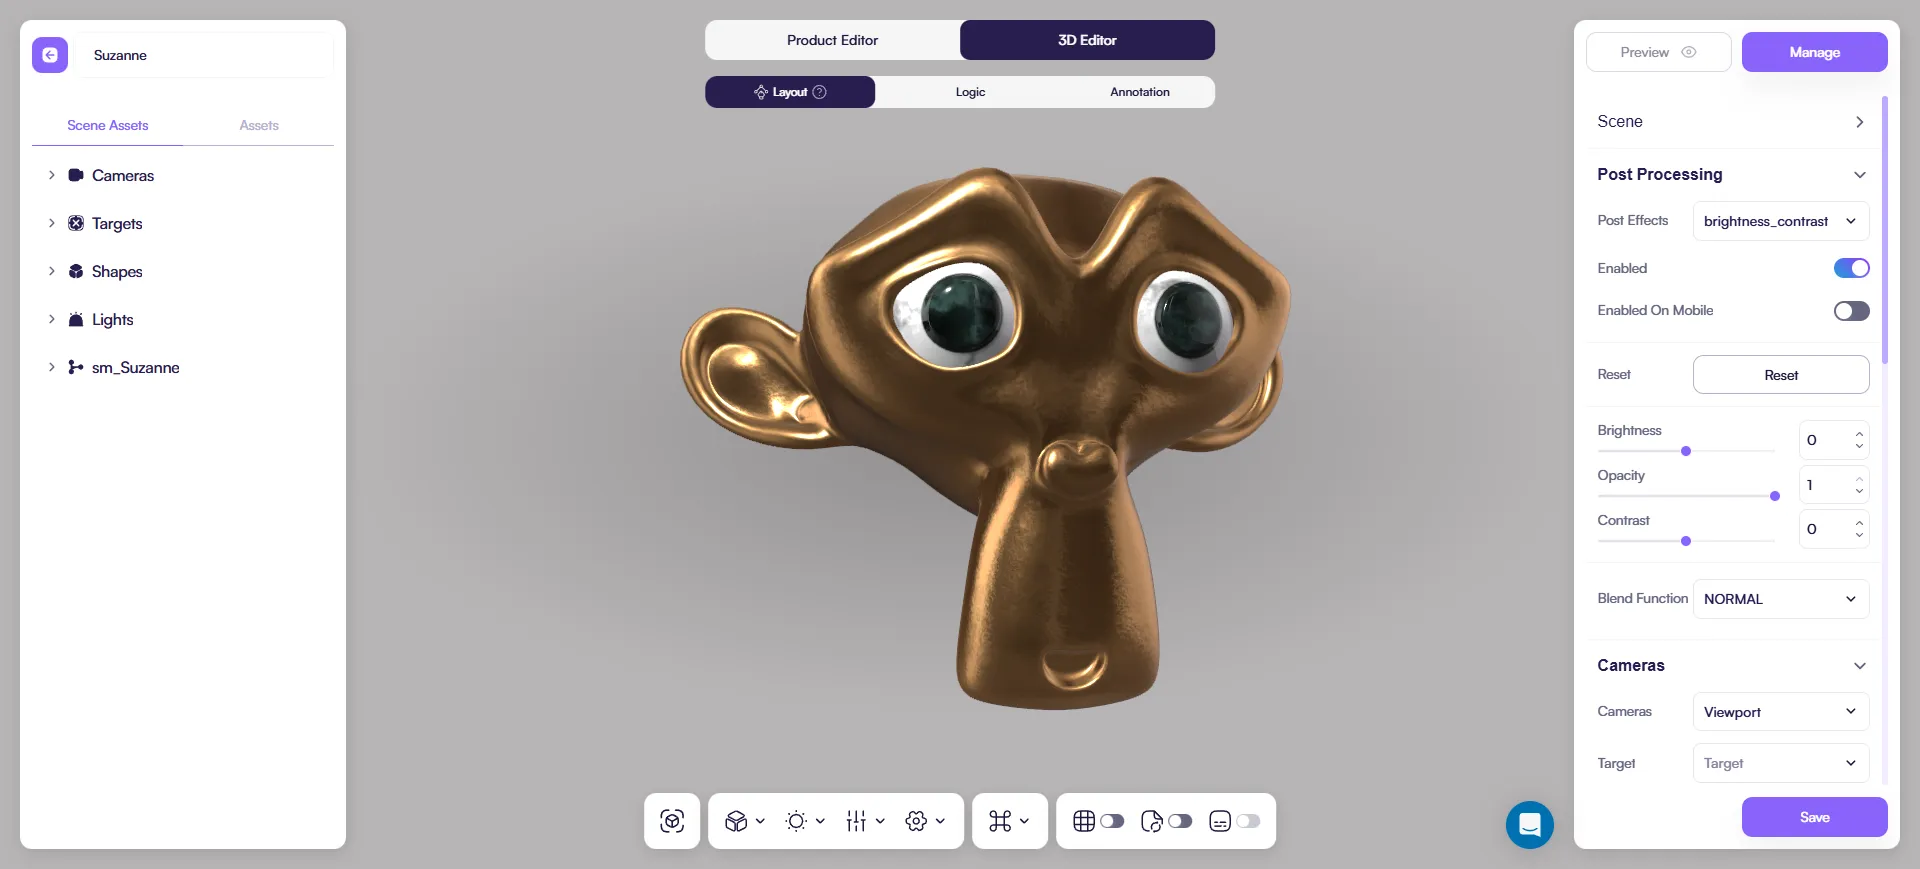
Key settings:
- Brightness
- Contrast
- Opacity
- Blend Function — how the adjustment mixes with the image
Tip: Small changes go a long way. If the image starts looking “crushed” or overly dramatic, reduce Contrast first. For most cases we leave it off and work mostly with materials and lighting.
6) SMAA
Reduces jagged edges (anti-aliasing).
Use it for:
- cleaner silhouettes and thin details
Key setting:
- Opacity
Tip: If you enable it on mobile, test performance on a weaker phone.
7) Tone Mapping
A more “camera-like” exposure and highlight behavior.
Use it for:
- scenes where highlights feel harsh
- scenes that look washed out or inconsistent between environments
Key settings (keep it simple):
- Opacity
- Middle Grey / White Point (overall exposure feel)
Important: Don’t tune tone mapping in both places. If you use this effect, treat it as your main tone mapping control.
8) SSAO
Adds subtle contact darkening in corners and tight gaps, giving more depth.
Use it for:
- products with lots of small shapes and overlaps
Key settings:
- Intensity: strength
- Radius: size/spread
- Samples: quality vs performance
Tip: SSAO can be expensive. If performance drops, disable it first.
9) Hue / Saturation
Basic color grading.
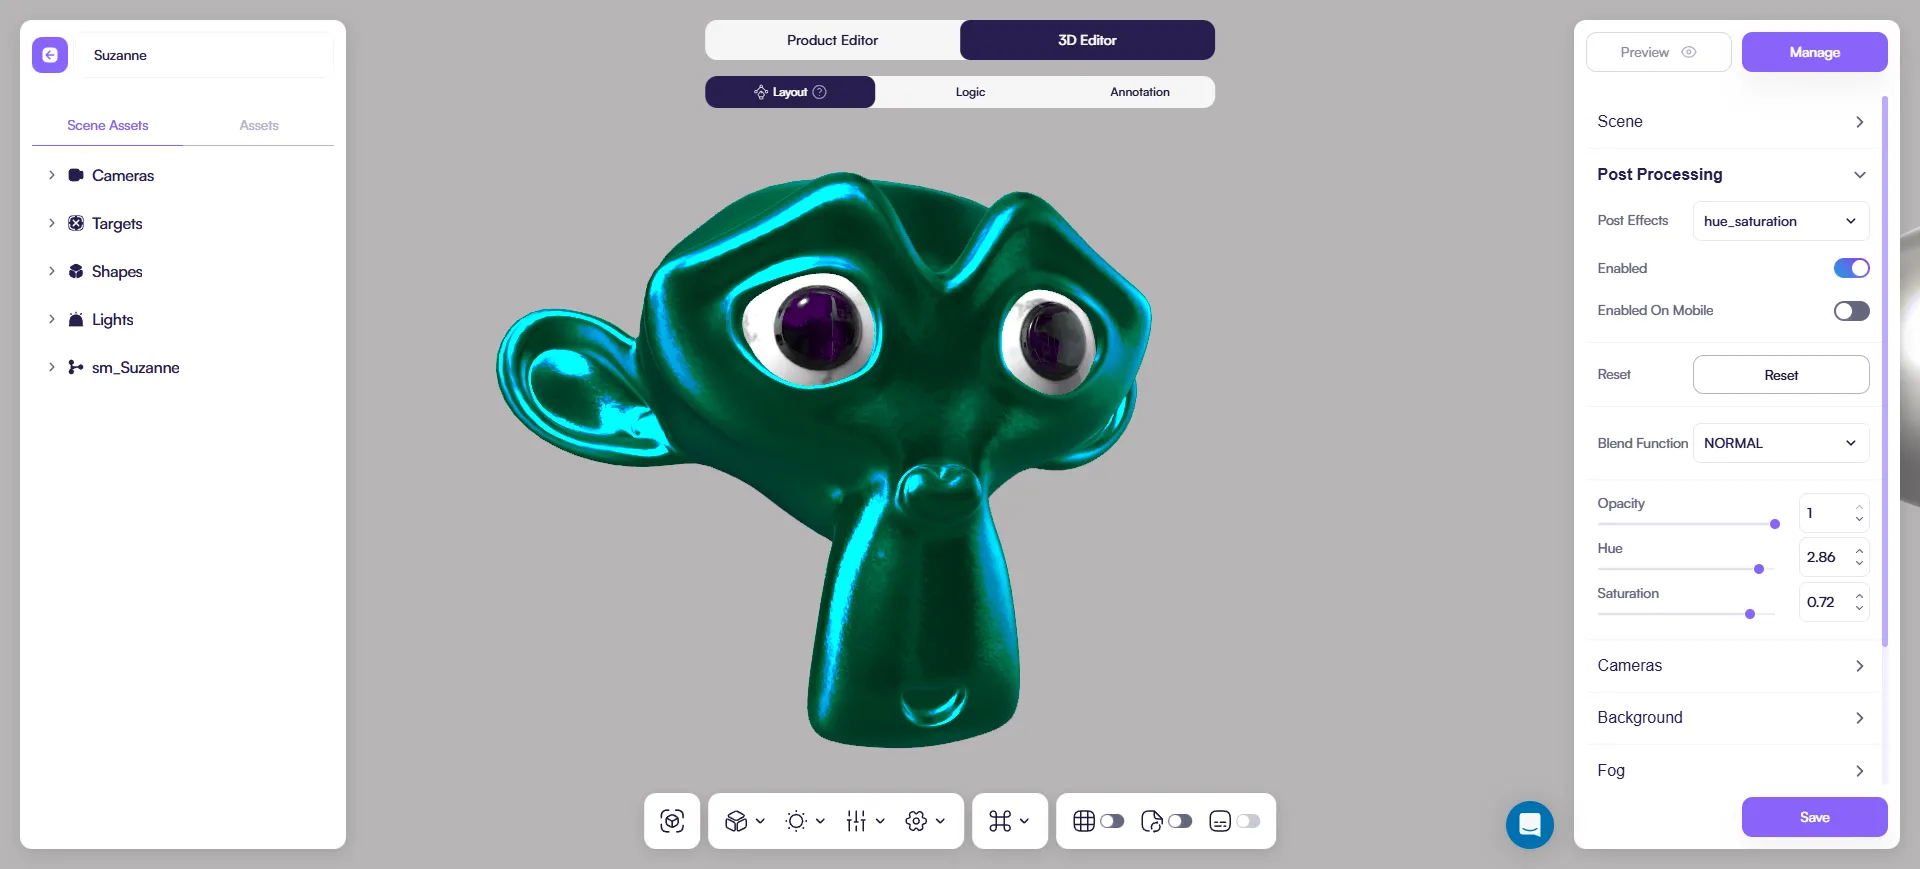
Use it for:
- matching a brand mood
- slight color corrections
Key settings:
- Hue
- Saturation
- Opacity
Tip: Keep it subtle so materials still look realistic.
10) Vignette
Darkens edges to keep attention on the product.
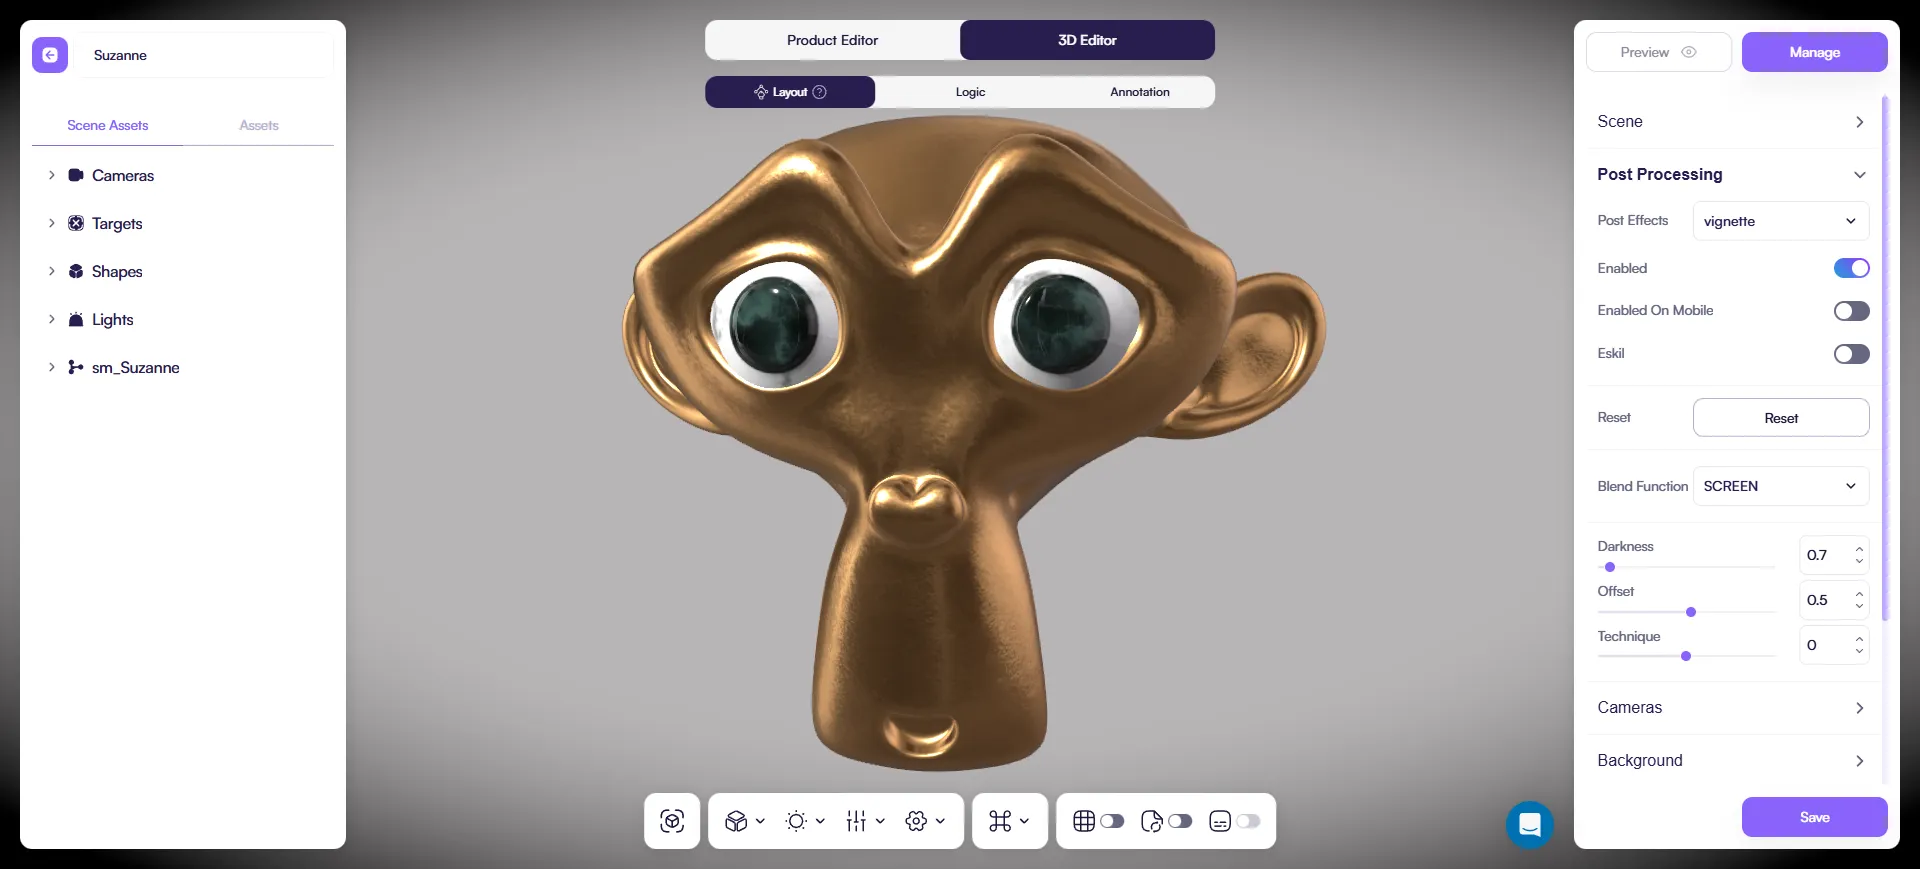
Use it for:
- a simple “photography” feel with minimal effort
Key settings:
- Darkness
- Offset
- Opacity
Tip: A tiny vignette often looks better than a strong one.
Practical recommendations
- Start with one effect and keep it subtle.
- If you need more, add one more — then stop and evaluate.
- For mobile, enable effects only when you’ve tested performance.
- Heavy hitters: DOF and SSAO (use carefully).
- If Bloom is enabled but you see nothing, check Select by Bloom on the object.