Custom Objects
Overview
Custom Objects are simple helpers you can add in the 3D Editor without changing your product model. Use them to stage the scene, improve presentation, and support specific configurator features.
Location
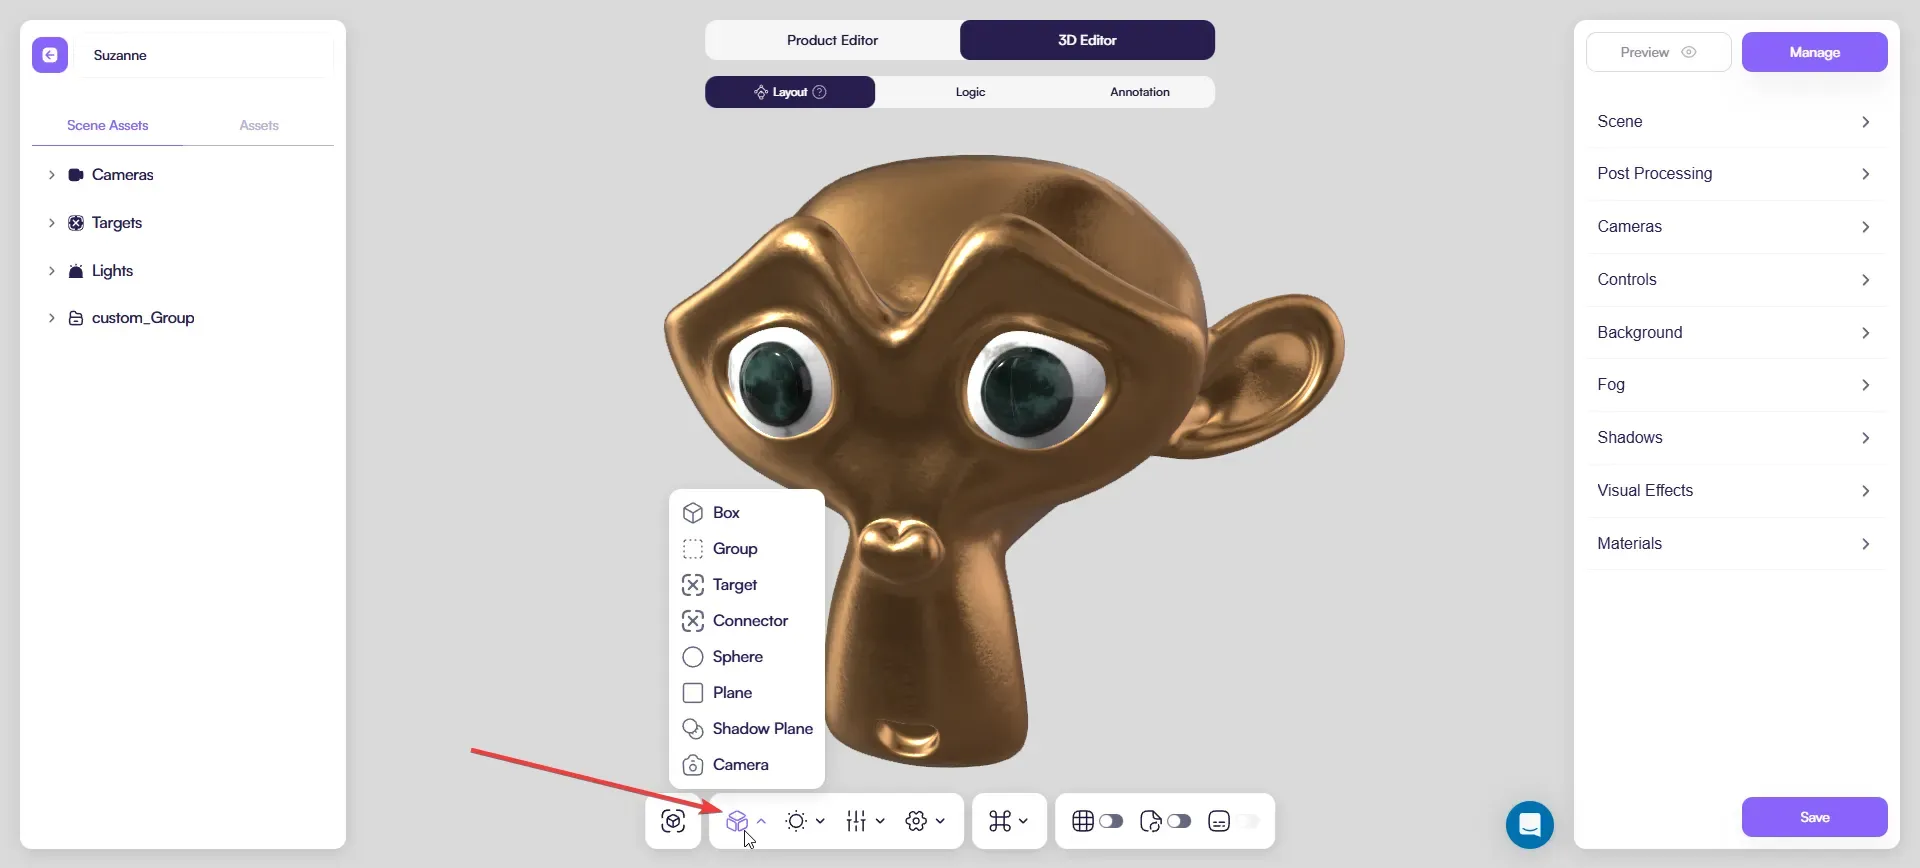
In 3D Editor, click Custom Objects in the bottom toolbar.
What you can create
From the Custom Objects menu you can add:
- Box
- Group
- Target
- Connector
- Sphere
- Plane
- Shadow Plane
- Camera
Box
Box is a simple primitive you can add for quick scene work.
Use it to:
- check scale and spacing around the product
- block out a platform/stand or a simple background shape
- leave a temporary placeholder (then delete it)
Group
Group is an organization tool — think of it as a folder.
You can drag any scene objects into a Group (including imported models and custom objects).
Use it to:
- keep helpers in one place (for example, a
helpersgroup) - move multiple objects together
- keep the Scene panel clean and easy to navigate
Target
Targets control where a light or a camera points.
Use Targets to:
- aim a key light at the product
- keep a camera focused on the same point across variants
You can:
- use one Target for multiple lights/cameras, or
- create separate Targets when you need different focus points
Connector
Connector is a special object used only with the Repeater attribute.
Use it to define how repeated elements connect to each other (for example, fence sections).
Sphere
Sphere is another simple primitive.
Use it to:
- mark a point in space (easier to read than a flat icon)
- test scale/clearance visually
- block out a rounded element as a temporary placeholder
Plane
Plane is a flat surface.
Use it to:
- create a clean floor under the product
- add a simple backdrop for more “studio-like” previews
Shadow Plane
Shadow Plane helps you place a clean shadow under the product.
Use it when:
- you want the product to feel grounded
- you use Contact shadows in Scene → Shadows
Tips:
- keep it sized only to what the camera can see
- if you already use a baked shadow decal asset, Shadow Plane is usually not needed — pick one approach
Camera
A configurator already has a default camera.
Add extra Cameras when you need additional angles (front, side, detail).
Camera controls and limits are covered in the dedicated Camera article.
Best practices
- Add only what you need — fewer helpers are easier to maintain.
- Use clear names (example:
shadow_plane,target_key,cam_detail). - Keep helpers organized inside a Group.