Advanced Materials
Overview
Advanced materials extend basic material behavior with effects such as coatings, light transmission, strong reflections, and stylized shading. Use them only when MeshStandardMaterial cannot produce the required visual result.
Location: Material Editor → Properties → Type
When to use advanced materials
Use an advanced material when at least one of the following is required:
- Light must pass through the surface (glass, clear plastic)
- A glossy top layer is needed (clearcoat, varnish)
- Strong reflections are required (mirror, reflective floor)
- Stylized, lighting-independent shading is needed (MatCap)
- A shadow-catcher plane is required
Always start with basic materials. Switch to advanced materials only when there is a clear visual need.
Material setup workflow
Open the Material Editor
You can access a Material Editor in three supported ways:
- Assets
- Open Assets → Materials
- Select the material you want to edit
- 3D Editor
- Open 3D Editor
- Click the mesh in the viewport
- Open Materials and click Edit (pencil)
The Material Editor opens in a new browser tab.
- Edit directly in the scene (quick edits)
- Open 3D Editor
- Click the mesh in the viewport
- In Materials, tweak the material properties right in the panel
- Click Save
If you open the full Material Editor (via Assets or Edit), it opens in a new browser tab. Scene edits saved with Save also update the same material and appear in the Material Editor.
Choose the material type
- Open Properties → Type
- Select the required advanced material type
Supported advanced material types
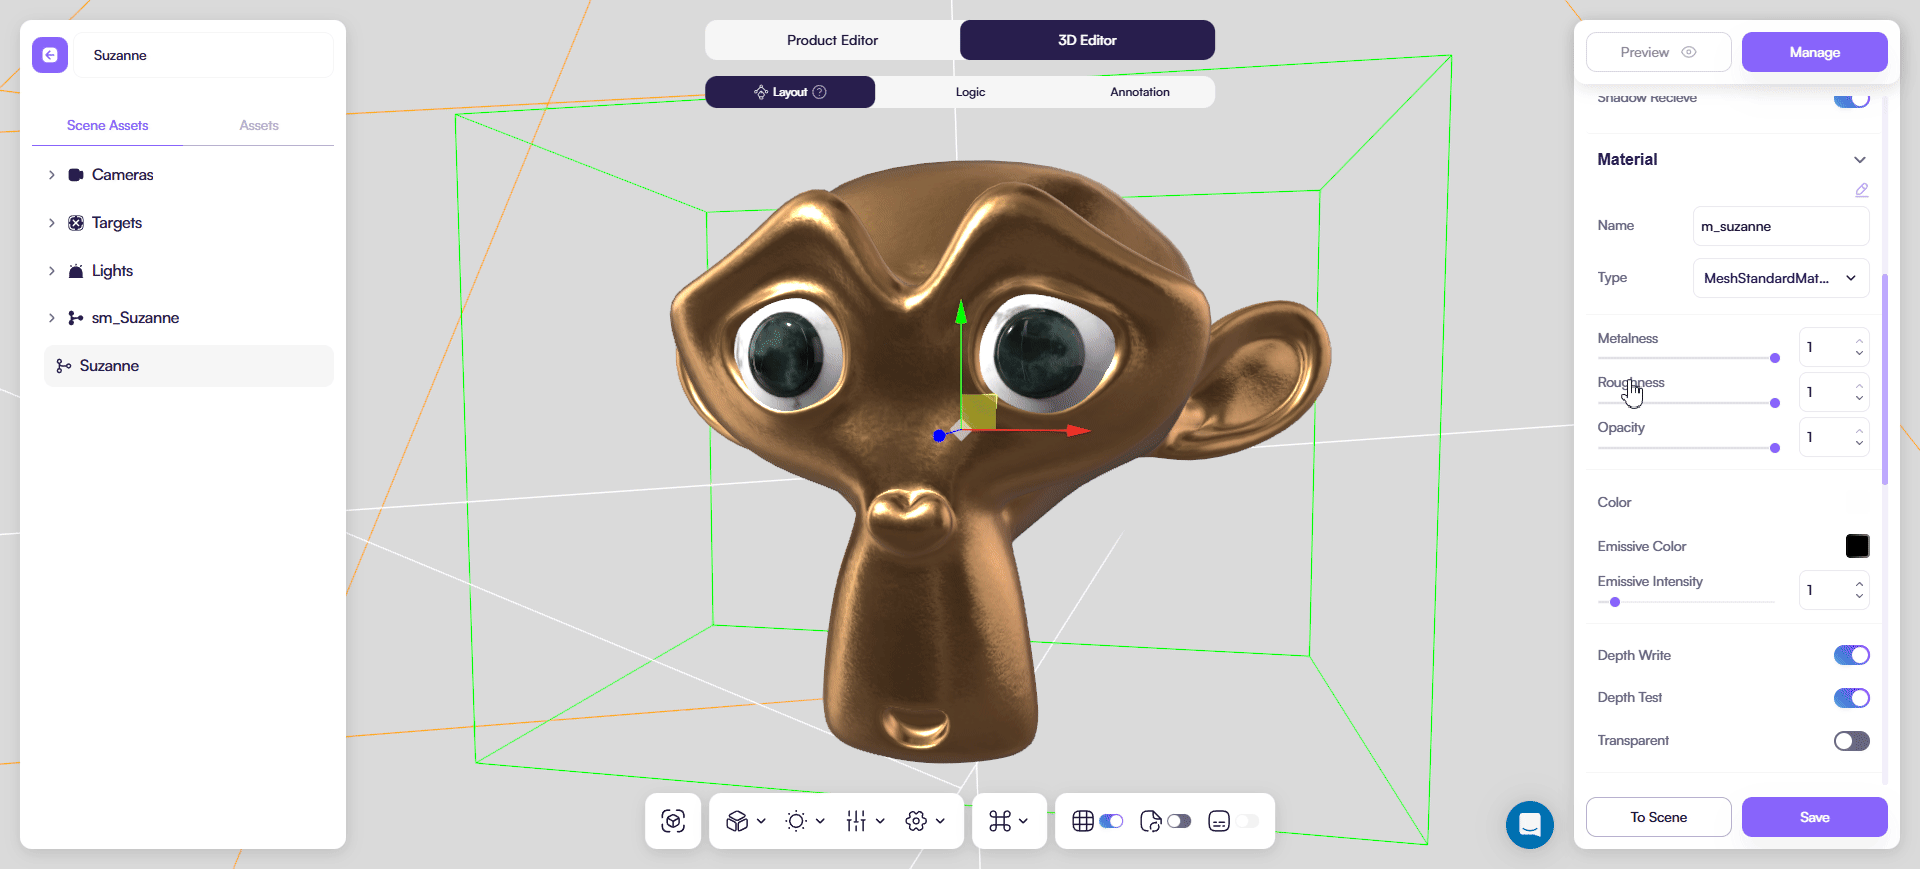
MeshPhysicalMaterial
Use this type for layered and physically based materials such as coated paint, fabric with sheen, and transmissive glass or plastic.
Setup order:
- Set Metalness
- Set Roughness
- Set Color
Keep the base stable before enabling additional effects.
Clearcoat (glossy top layer):
- Increase Clearcoat
- Adjust Clearcoat Roughness
Clearcoat affects highlights without changing the base color.
Sheen (fabric highlights):
- Increase Sheen
- Adjust Sheen Roughness
- Set Sheen Color
Transmission (glass / clear plastic):
- Increase Transmission
- Set Thickness
- Adjust ior
Transmission controls how light passes through the surface. ior and Thickness define refraction strength.
Optional effects:
- Iridescence — subtle optical color shift (use small values)
Classic transparency (rare):
- Enable Transparent
- Adjust Opacity
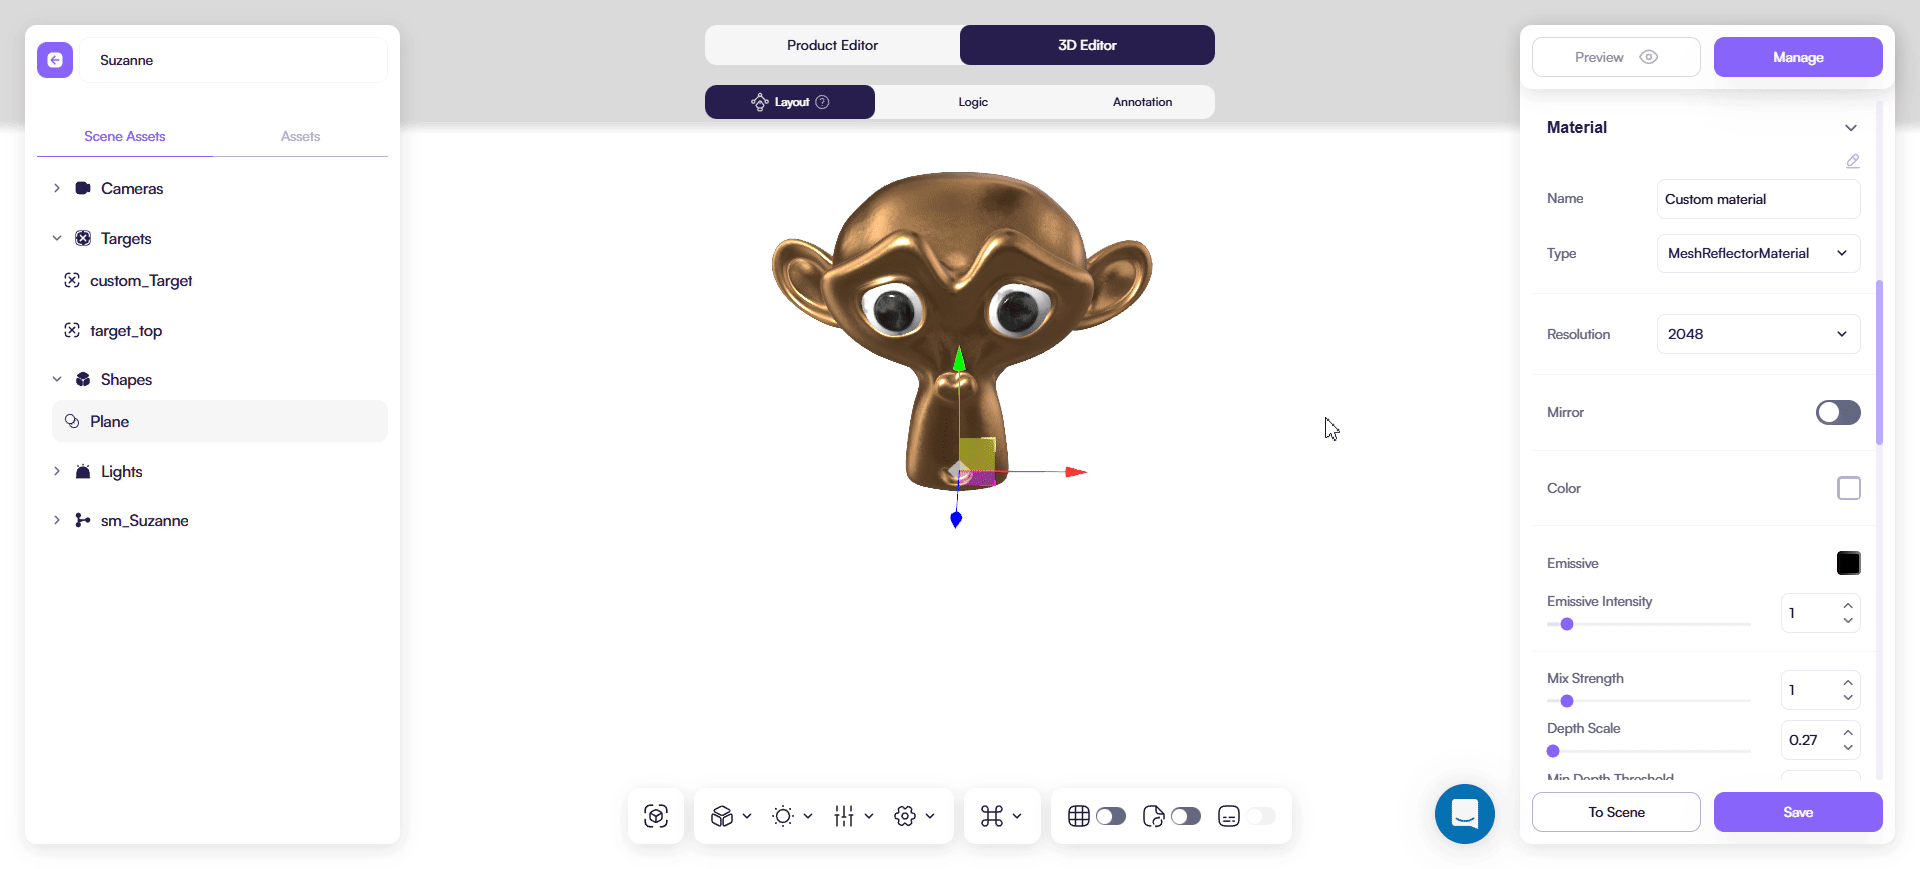
MeshReflectorMaterial
Use this type for mirrors and reflective floors or panels. This material is performance-heavy.
Setup order:
- Set Base Color
- Set Resolution (start low)
- Adjust **Mix Strength **(controls the blur)
Optional controls:
- Mix Blur, Blur X, Blur Y — soften reflections
- Depth Scale, Min Depth Threshold, Max Depth Threshold — depth-based fade
- Distortion — reflection warping
MeshRefractionMaterial
Use this type for controlled refraction and chromatic effects. This material is performance-heavy.
Setup order:
- Set ior
- Set Fresnel
Optional effects:
- Aberration Strength — chromatic distortion
- Fast Chroma — faster but less accurate chroma
Keep Bounces low to maintain performance.
MeshMatCapMaterial
Use this type for stylized shading that does not depend on scene lighting.
- Set Color
- Adjust Opacity if needed
- Set Side (usually Front)
Here’s an example of a MatCap material. It has baked lighting that could enhance your products surface.
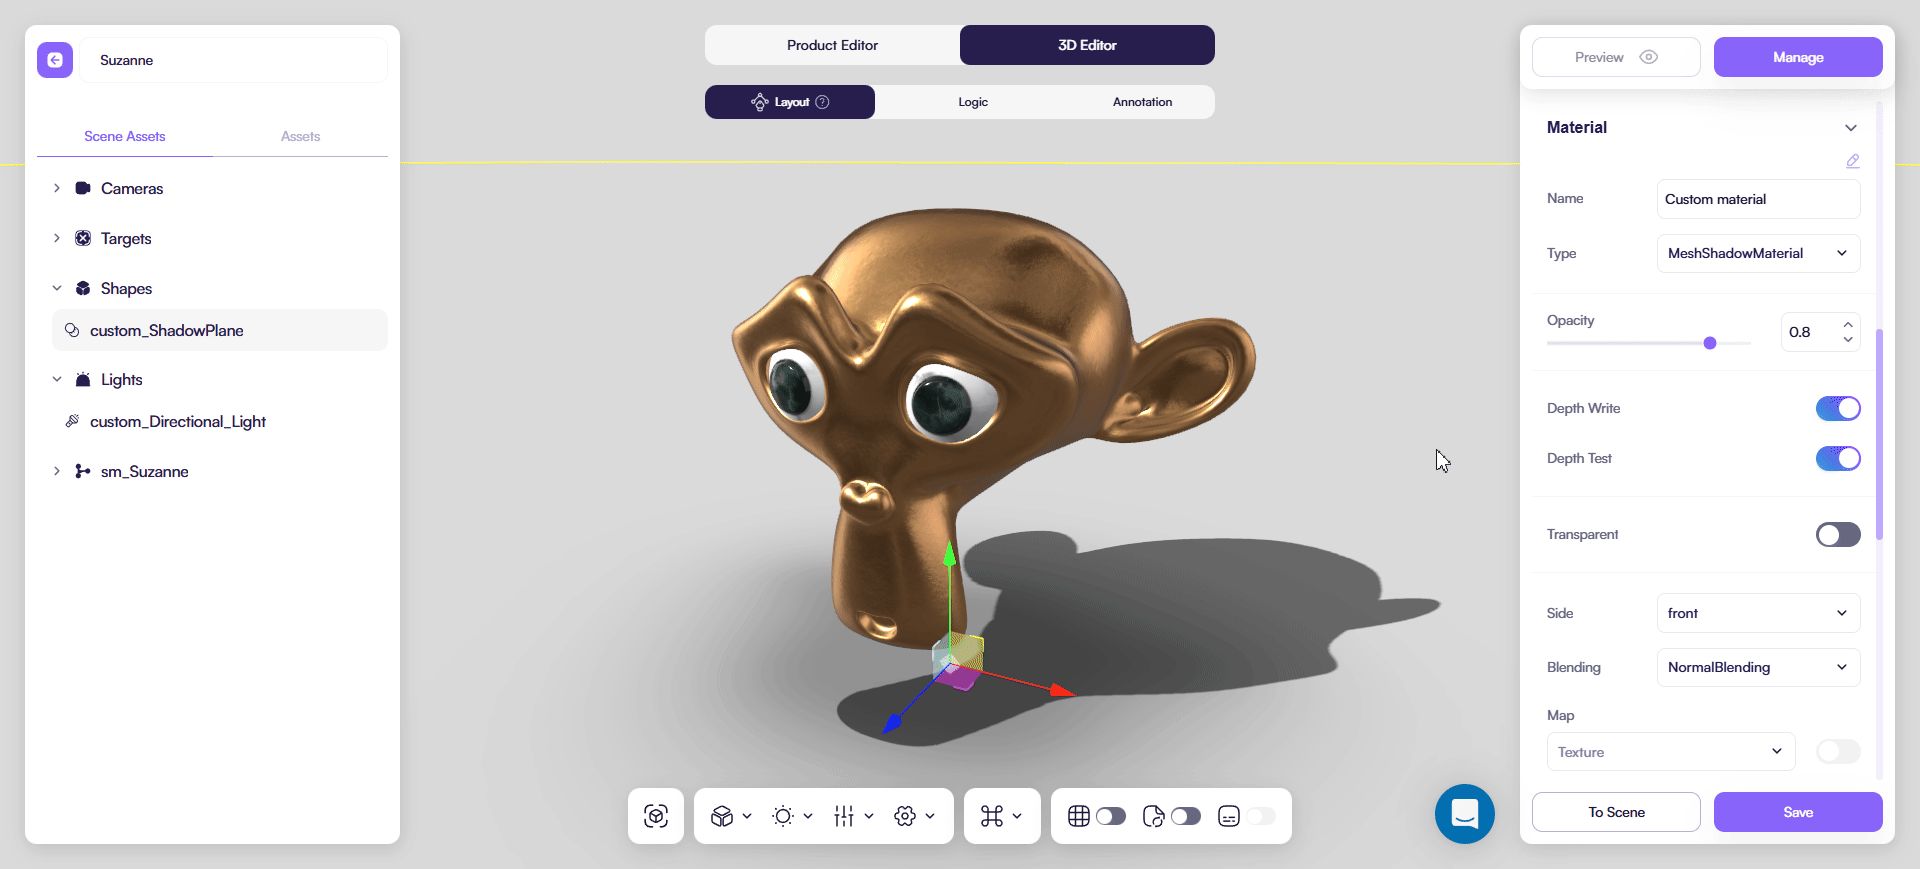
MeshShadowMaterial
Use this type for a shadow-catcher plane for a cast shadow.
- Keep Transparent enabled
- Adjust Opacity to control shadow strength
You can additionally fine-tune final look in a Shadows tab of a 3D Editor:
Practical rules
- Prefer MeshPhysicalMaterial for clearcoat, sheen, transmission, and ior
- Use MeshReflectorMaterial and MeshRefractionMaterial sparingly
- Avoid stacking multiple heavy effects in one material
After every meaningful change:
- Check the material under the real environment and lighting
- Switch PCOs quickly and look for flicker or incorrect states
- Test on mobile and low-end devices for performance