Textures
Overview
Textures define surface detail and material response in Amaspace. They control color information, surface roughness, metal behavior, and fine details without adding extra geometry. Correct texture setup improves visual quality and performance across desktop and mobile.
Where to upload textures
Textures are managed centrally in PCO & Assets → Assets.
- This is the main place for all models, materials, and textures
- Uploading here allows reuse across products
- Textures are stored first, then assigned to materials
Importing textures
Step 1: Open the Assets panel
- Open your product.
- In the left sidebar, click PCO & Assets.
- Make sure the Assets tab is active.
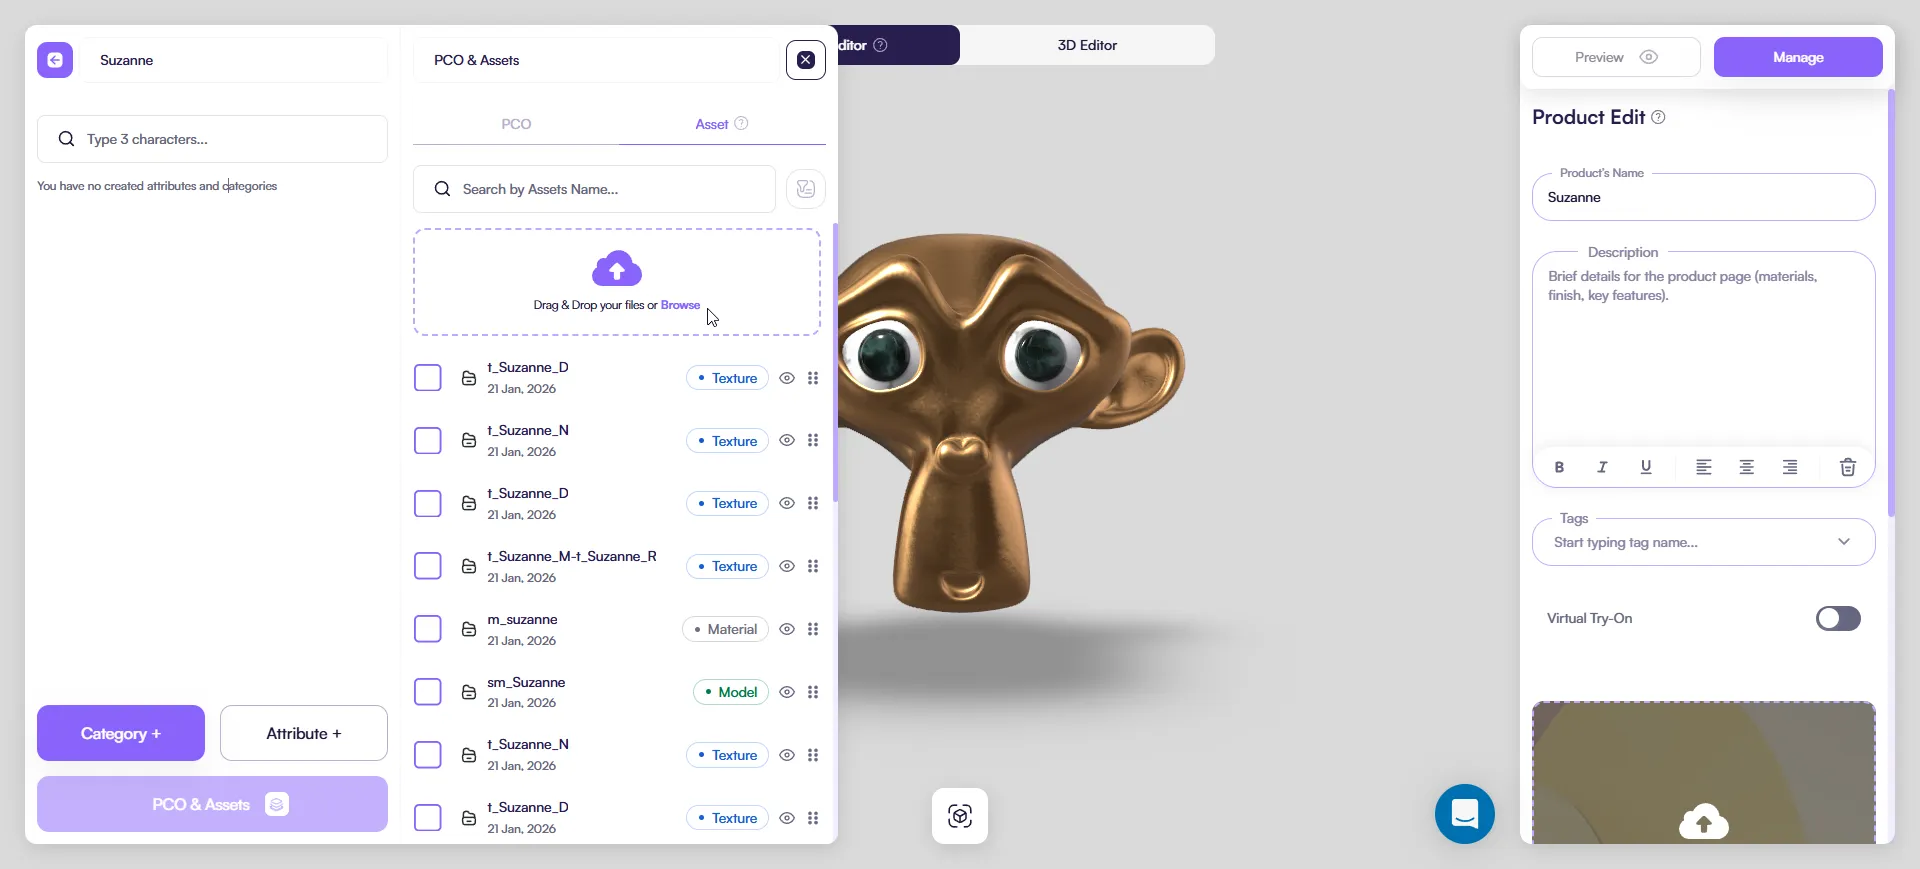
Step 2: Upload texture files
- Click Browse or drag & drop files into the upload area.
- Select texture files from disk.
Supported formats:
.jpg.png.webp

Naming convention
Use consistent, readable names for all textures:
t_ObjectName_D— Base Color (Diffuse)t_ObjectName_N— Normalt_ObjectName_R— Roughnesst_ObjectName_M— Metalnesst_ObjectName_MR— Combined Metalness + Roughness
Consistent naming makes assignment and debugging faster.
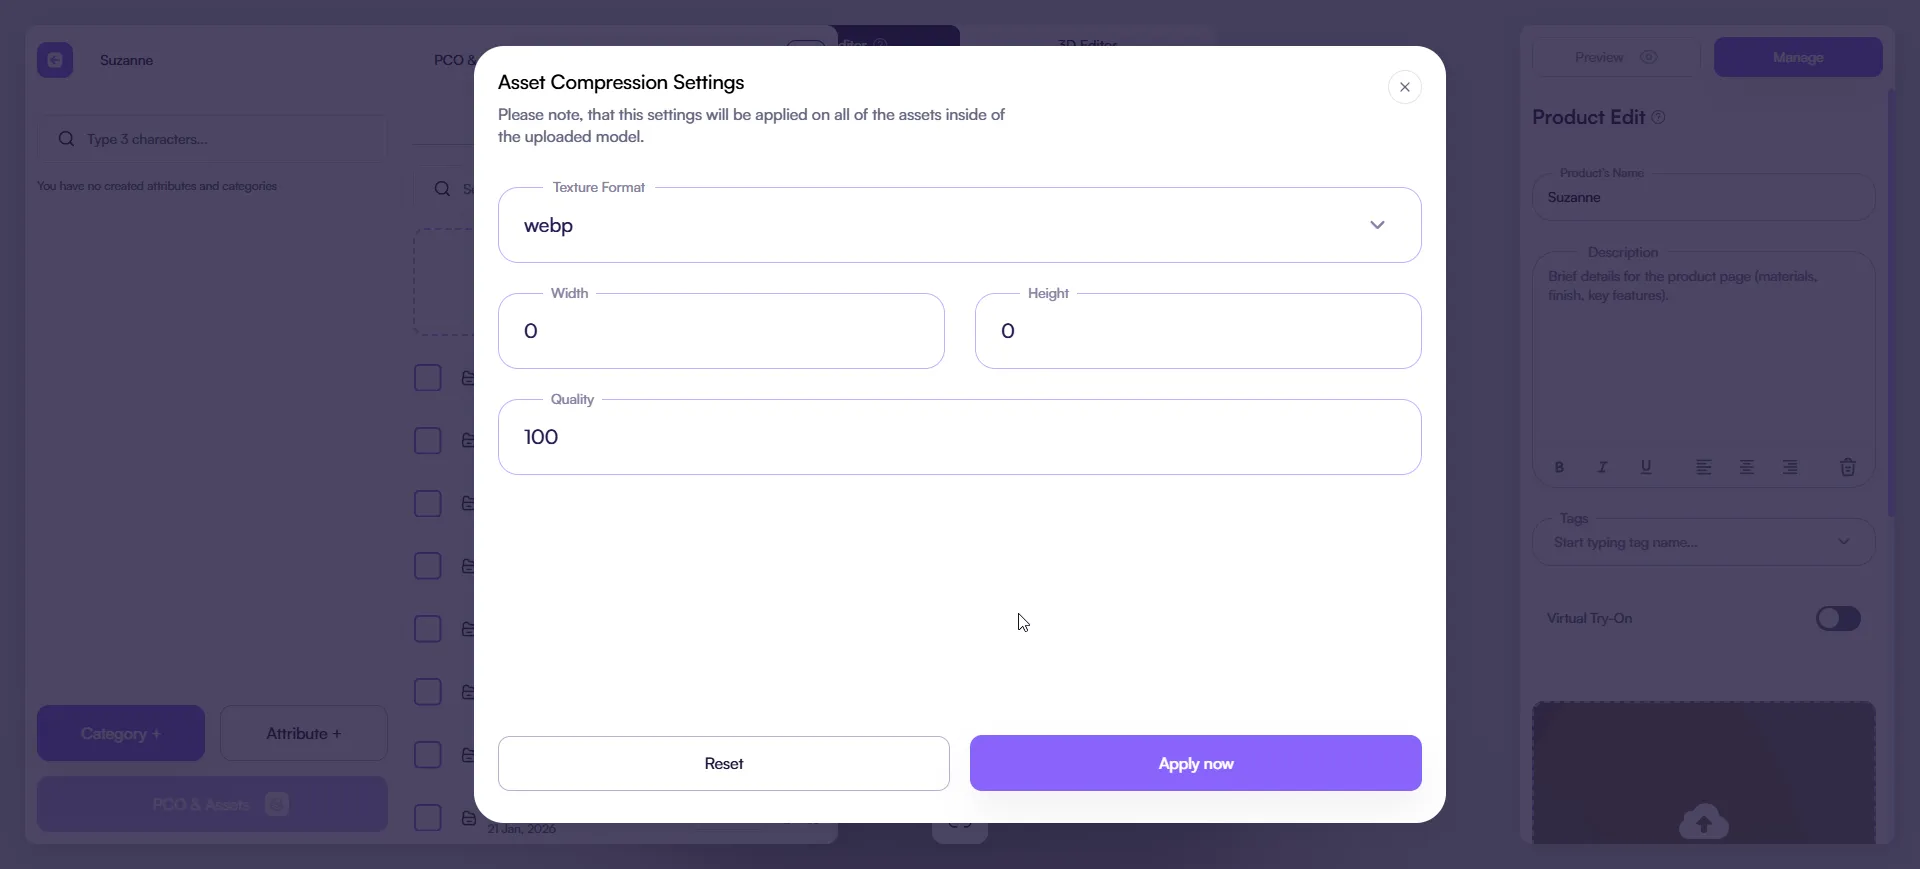
Compression settings (recommended)
After upload, the Asset Compression Settings dialog appears.
You can configure:
-
Texture format
webp(recommended for best quality/performance balance)
-
Width / Height
0keeps original resolution- Set a value (for example
1024) to resize
-
Quality
100= maximum quality- Lower values reduce file size
Click Apply now to process the textures.
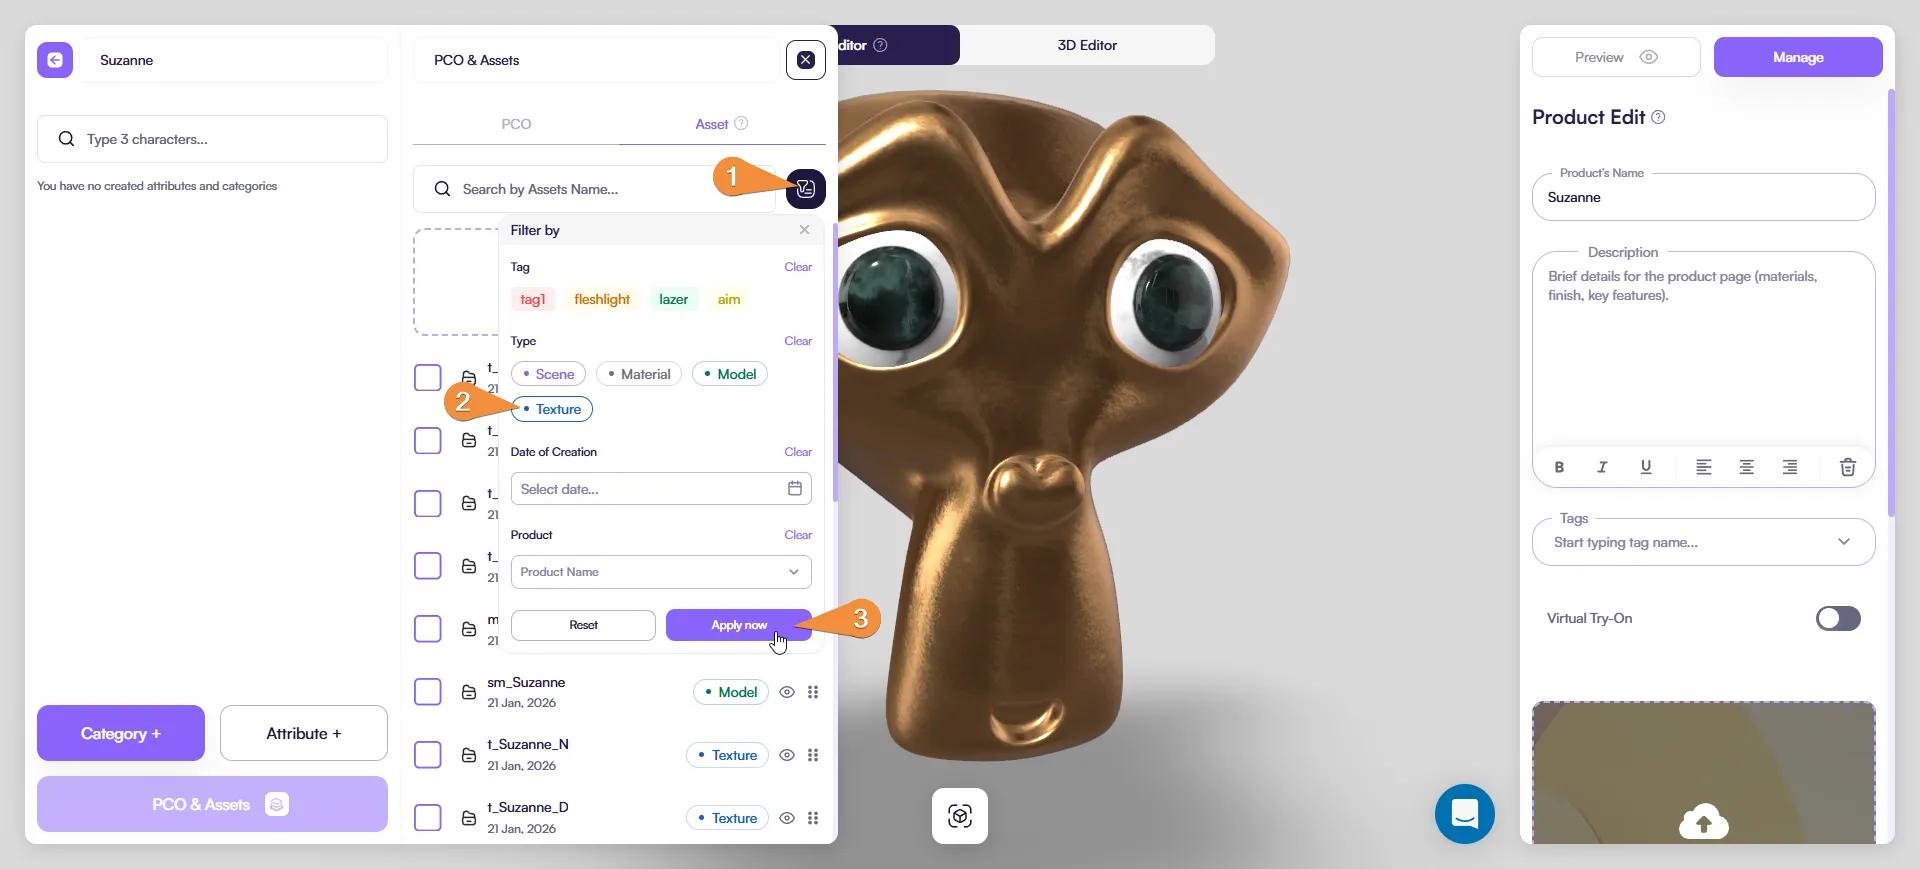
Filtering textures (optional)
When working with many assets, use filters to stay focused.
- Click the filter (funnel) icon next to the search field.
- Enable Texture.
- Only texture assets remain visible.
Use this when assigning textures or checking naming consistency.
Using textures in materials (through 3D Editor)
- Open 3D Editor.
- Select a mesh in the viewport.
- Open the Materials panel.
- Click Edit (pencil) on the material.
- In Properties → Map, assign textures to the correct slots:
- Base Color →
_D - Normal →
_N - Roughness →
_R - Metalness →
_Mor_MR
- Adjust material values if needed.
- Click Save.
Texture influence controls
When a texture is assigned, its effect is controlled in two places:
Top controls (sliders)
- Sliders at the top of the interface control how strongly the texture influences the material
- These affect visual strength, not resolution or quality
Texture slot controls
- Enable / Disable — toggle texture usage
- Texture field — click to replace with another texture
- X icon — remove the texture from the slot
Use sliders for fine-tuning and slot controls for management.
Validation
After assignment:
- Rotate the model in the viewport.
- Check:
- Surface detail
- Roughness and reflection response
- Normal map strength
- Performance (no unnecessary large textures)
If something looks wrong, re-check texture assignment and compression settings.
Best practices
- Upload textures through Assets for reuse
- Use WebP for performance
- Keep texture resolution as low as possible without visible quality loss
- Avoid unnecessary texture slots