Modular layouts
A modular layout is a set of parts the customer can add to the scene. Each part is an option value — a modular PCO — with its own 3D model, price, and preview image.
The parent product stays one product in the catalog. The modules are option values on that product, grouped into a Modular Layout.
On Kitchen Customizer Demo the groups are Top, Bottom, and Appliances. Inside Top, the layout Top Modules holds the cabinets and side facades the customer can add.
Create a modular layout
Step 1: Open the product
- Go to Products .
- Open the product.
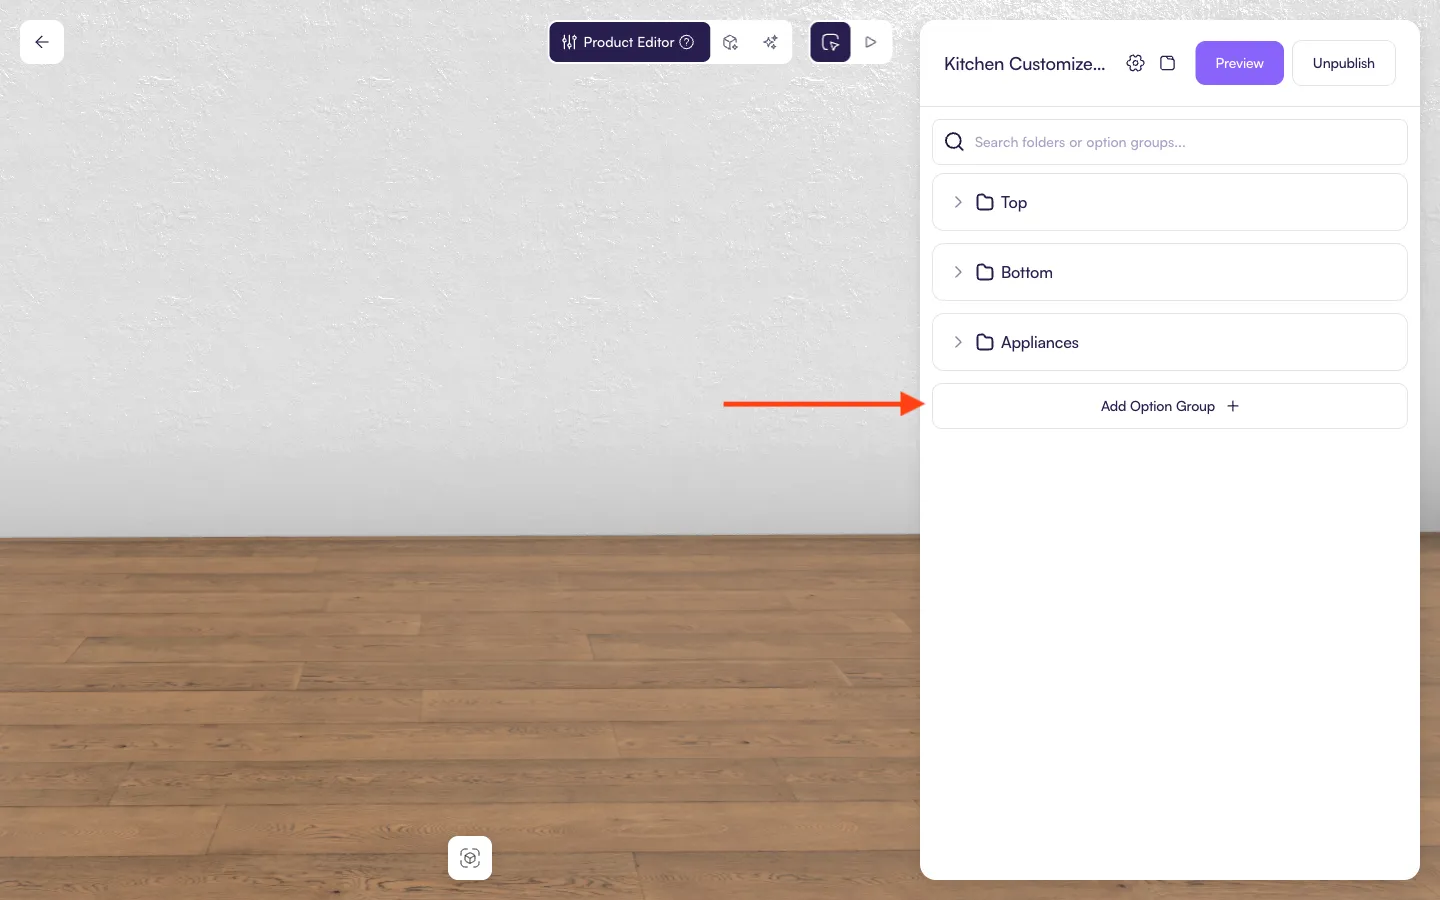
The editor lists folders. Add Option Group at the bottom is where a new layout starts.
Step 2: Choose Modular Layout
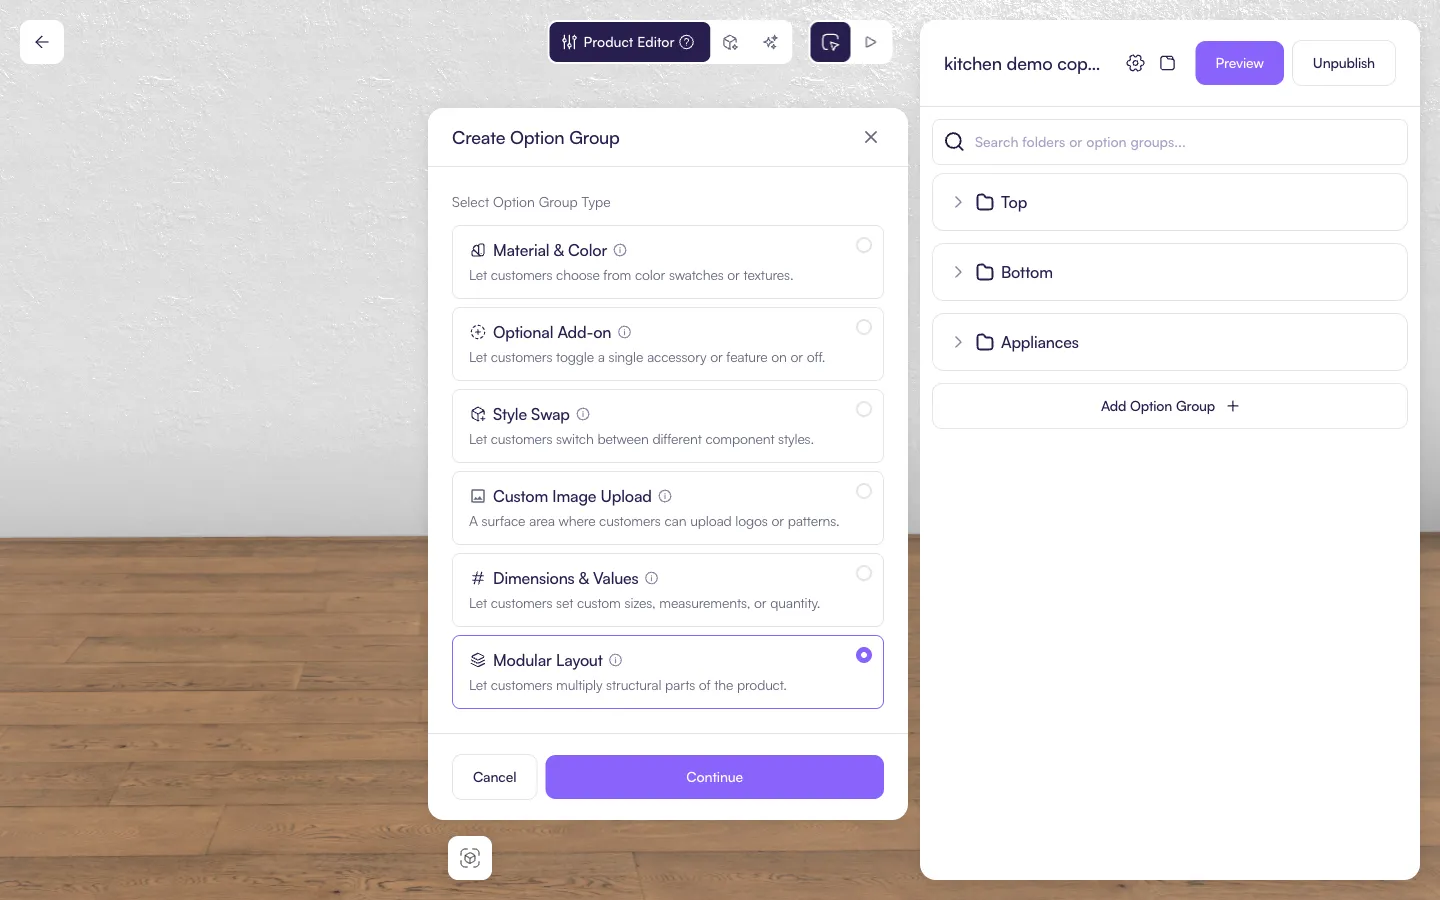
- Click Add Option Group.
- Select Modular Layout. Its description is “Let customers multiply structural parts of the product.”
- Click Continue.
Step 3: Name the layout and attach modules
The create form has two fields.
- Option Group Name — the name of the section, such as Example modules or Top Modules.
- Option Values — the module products customers can add. These are the modular PCOs.
Open Products and tick the modules that belong in this layout.
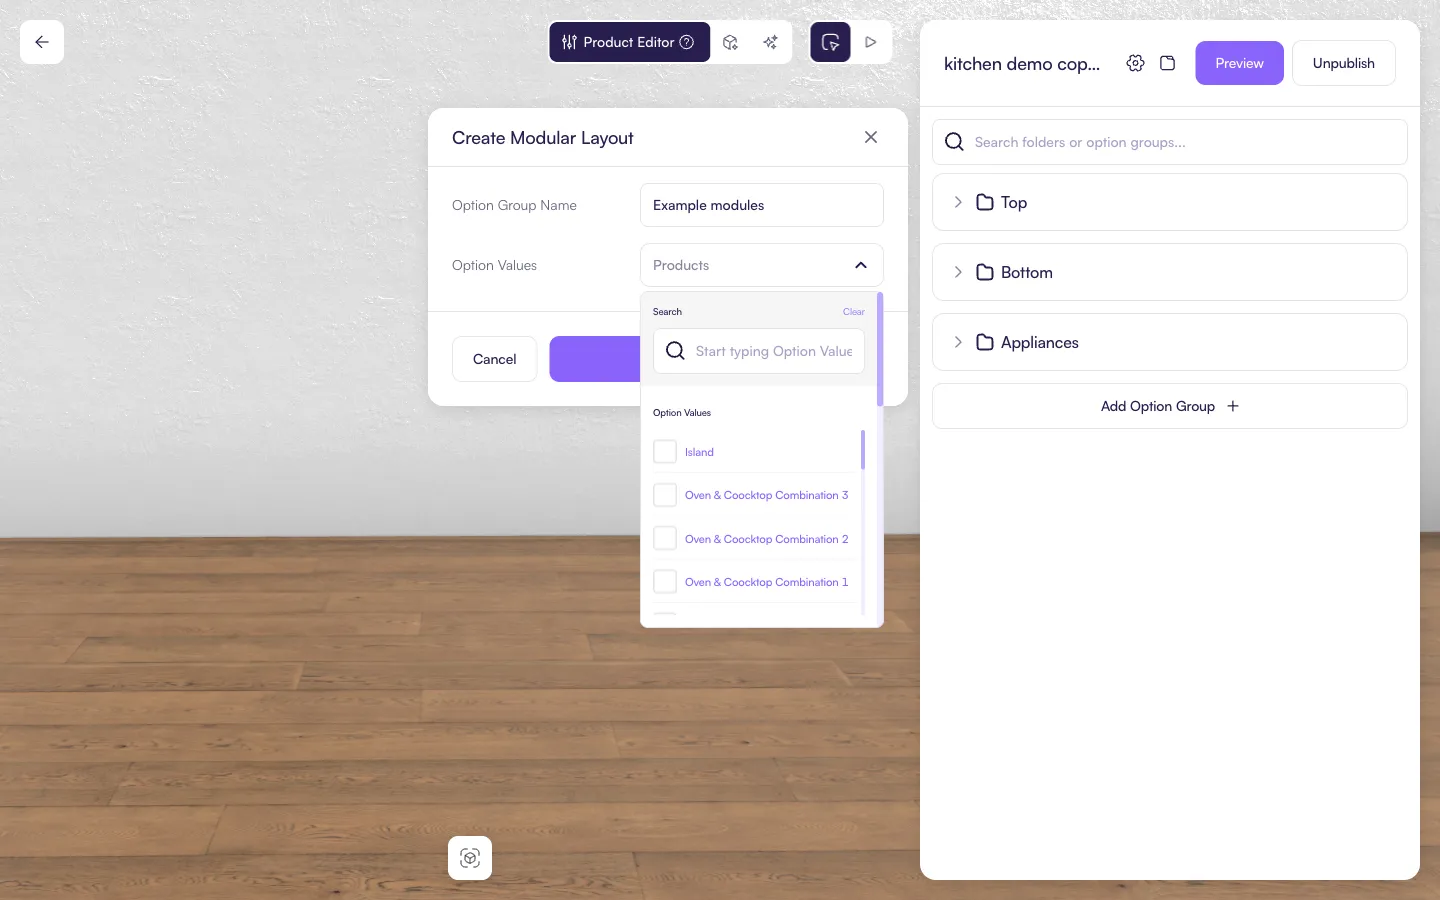
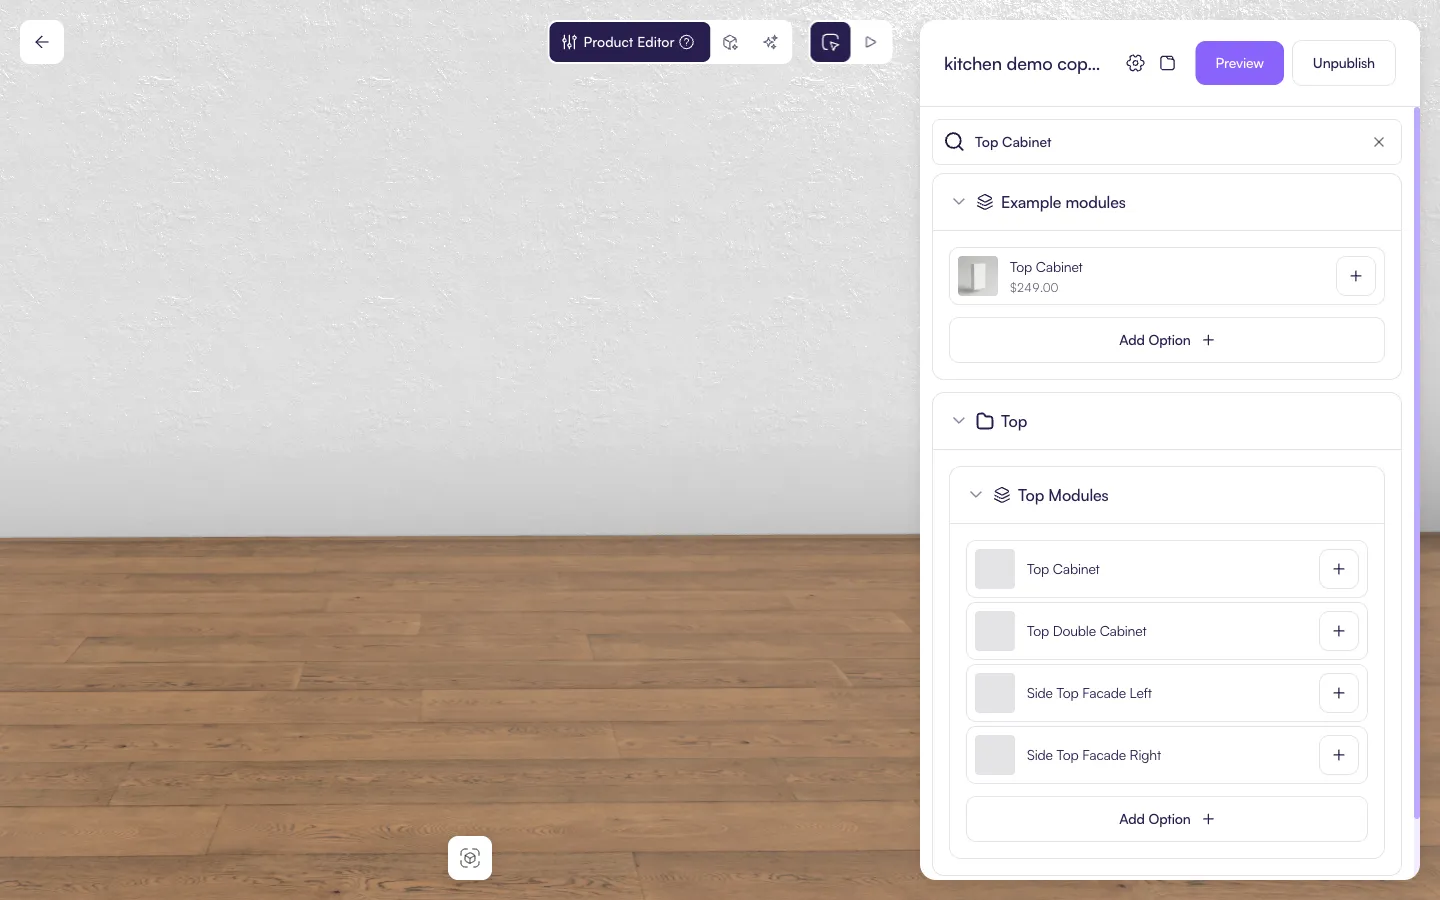
A filled example: name Example modules, option value Top Cabinet.
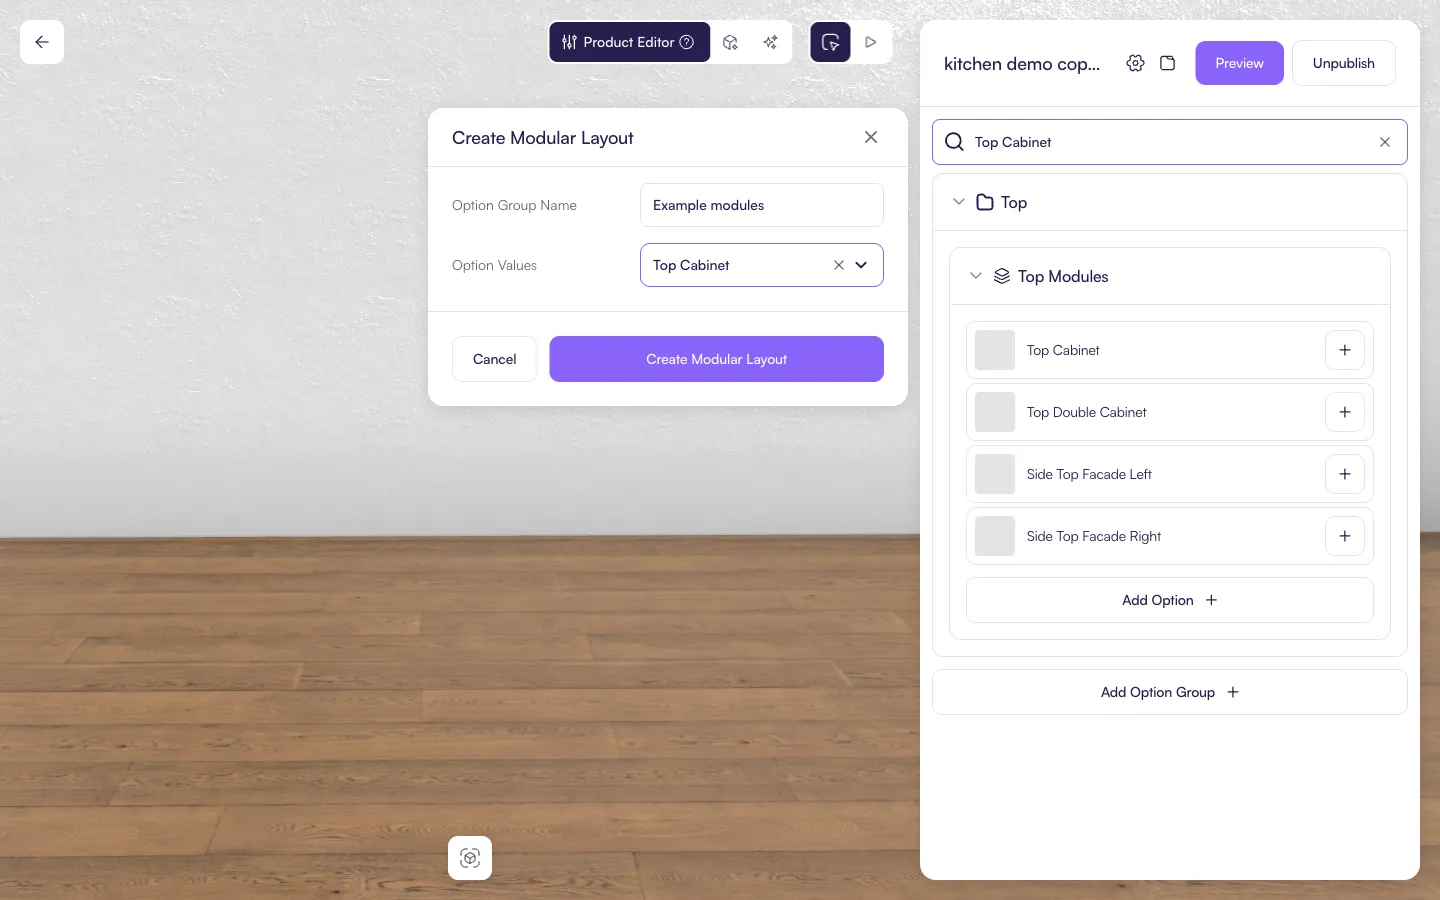
Click Create Modular Layout. The new group appears in the list with the module you attached, and an Add Option row under it.
Step 4: Add another module
Add Option is how you put more modules on a layout that already exists.
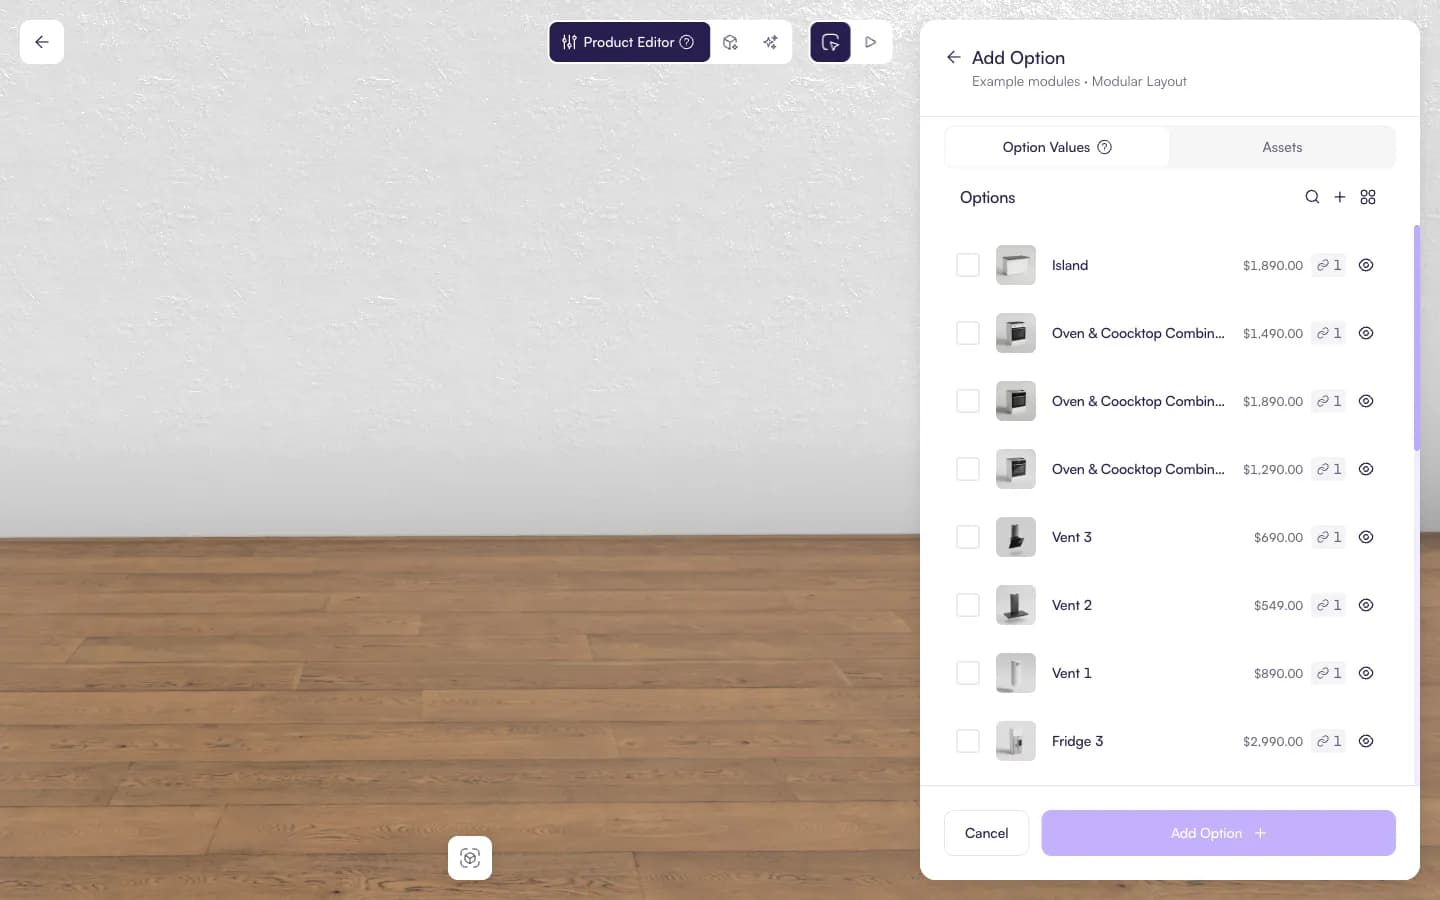
- On the layout, click Add Option.
- The panel is titled with the layout name and Modular Layout.
- On Option Values, tick an existing module and click Add Option.
- On Assets, tick a 3D model instead. Saving turns that asset into an option value on this layout.
Step 5: Edit a module
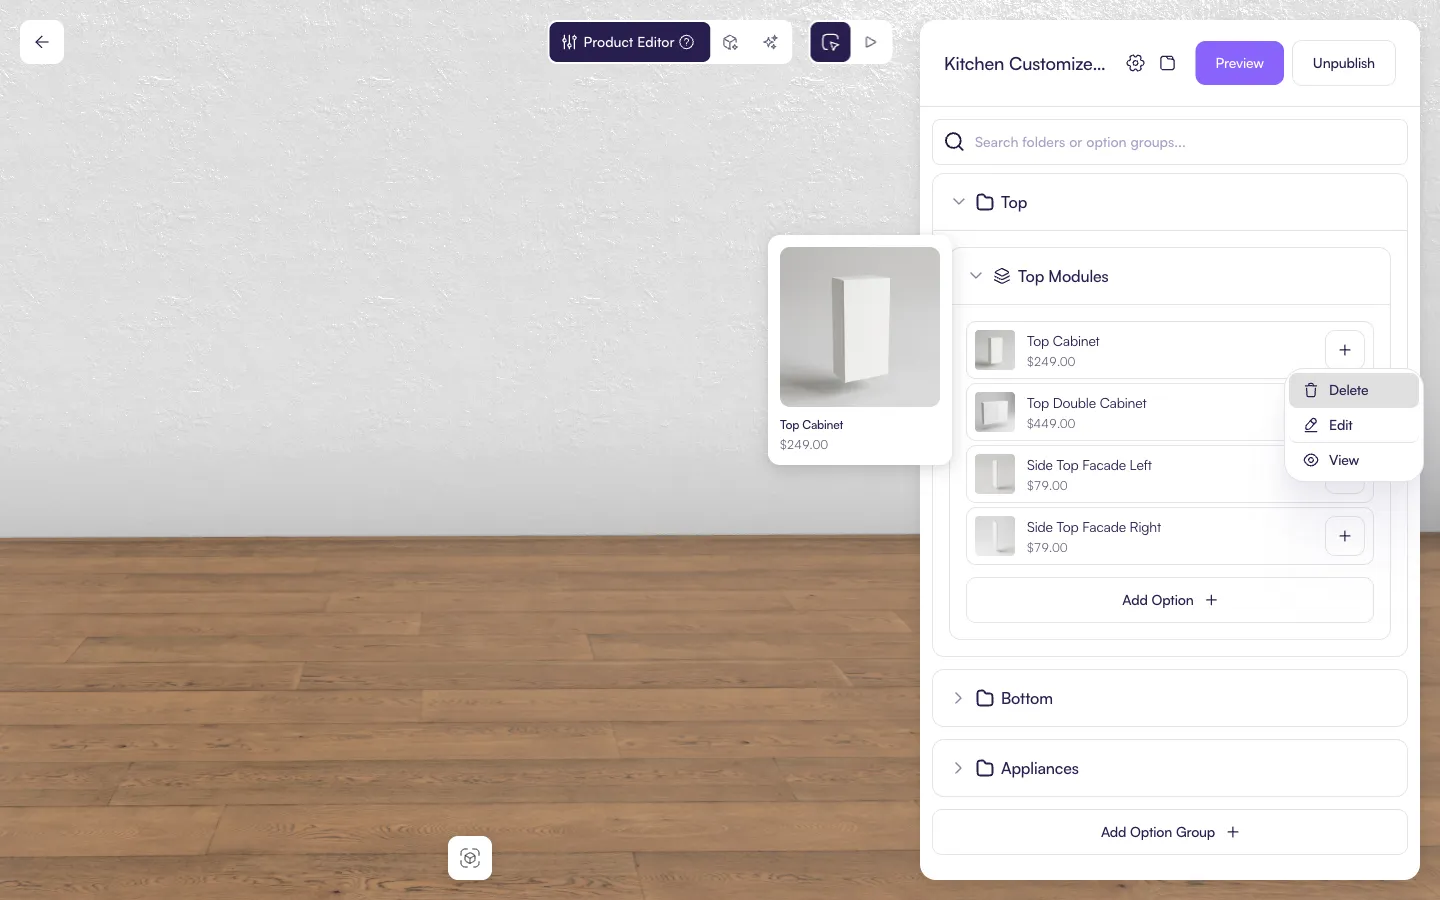
On the module row, open ⋯ and choose Edit.
The option value form is where you set what that module is.
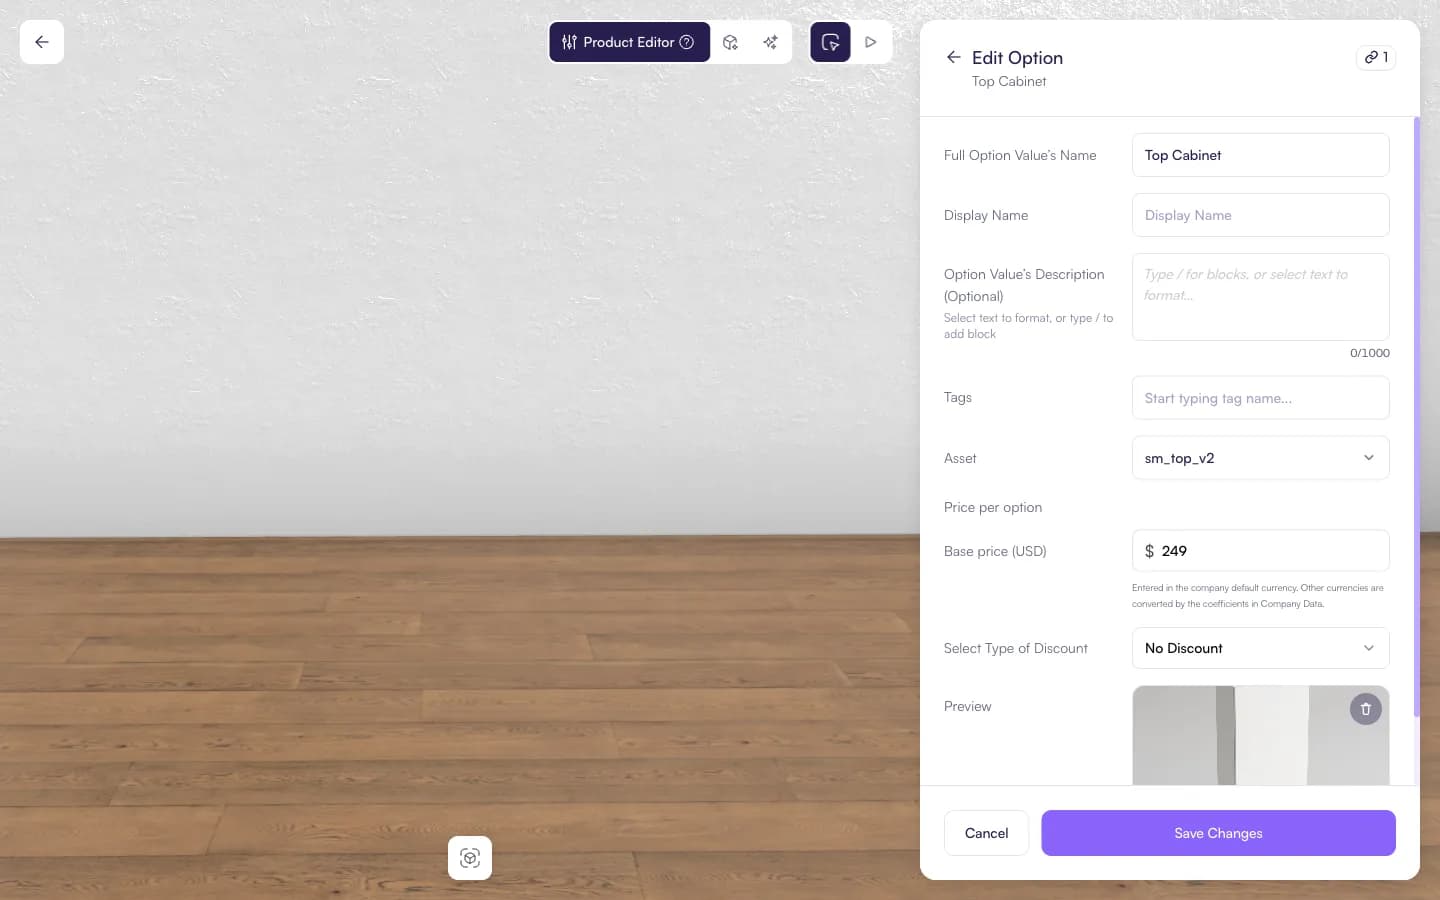
- Full Option Value’s Name and Display Name — the name in the editor and the name the customer sees.
- Option Value’s Description — optional text for the module.
- Asset — the 3D model placed in the scene when the customer adds this module.
- Base price — the price added for one of this module. It is entered in the company default currency.
- Select Type of Discount — optional discount for this module.
- Preview — the thumbnail in the module list. JPG, PNG, or WEBP.
Save Changes stores the module. Cancel leaves it as it was.
View opens the module’s product. Delete removes it from the layout.
Connectors
A connector is a point on the module’s 3D model where another module can snap. You set connectors in the 3D Editor, on the module itself, not on the parent product.
- On the module row, choose View.
- Switch from Product Editor to 3D Editor.
- In Scene Assets, open the model. The connectors are listed with the meshes.
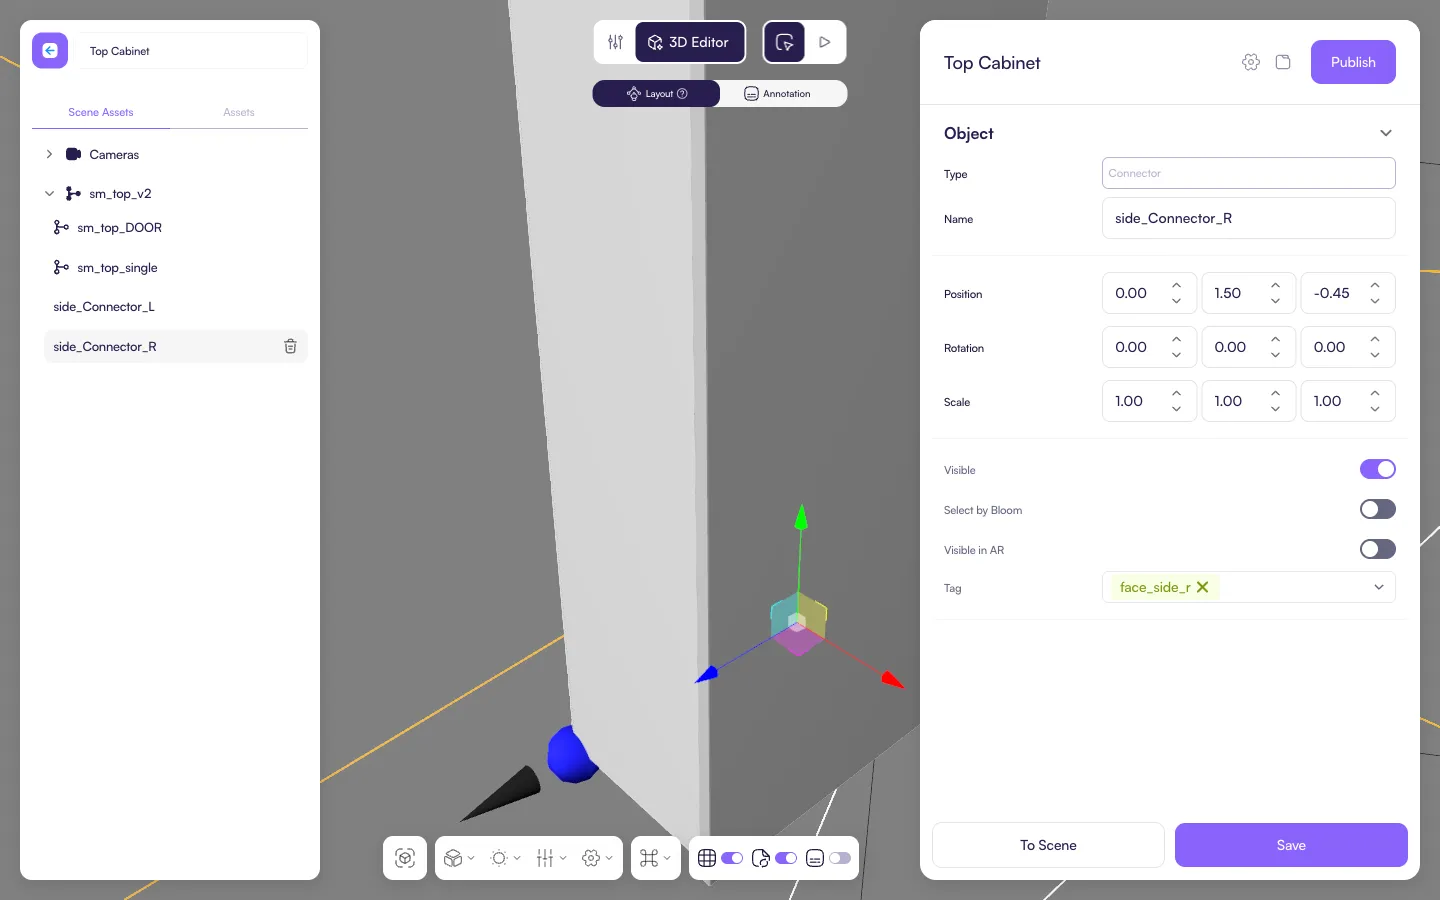
Select a connector to place it and to give it a tag.
- Position, Rotation, and Scale — where the snap point sits on the model. Put one on each side that should meet another module.
- Tag — modules snap where a connector on one shares a tag with a connector on the other. On Top Cabinet,
side_Connector_Lis taggedface_side_landside_Connector_Ris taggedface_side_r. - Visible in AR — leave this off. A connector is a helper, not part of the product the customer sees in AR.
On the model group, Move only the connectors keeps a module from staying where it was dropped if it did not snap. The customer can place it only where a connector matches.
Save in the 3D Editor stores the connectors on the asset.
What the customer sees
In the configurator, each Modular Layout is a section in the sidebar, such as Top. The customer uses Add Module to place a module in the scene, and can add more than one of the same module. When a connector tag matches, the new module snaps to the one already there.
The price at the bottom of the sidebar includes every module currently in the scene.